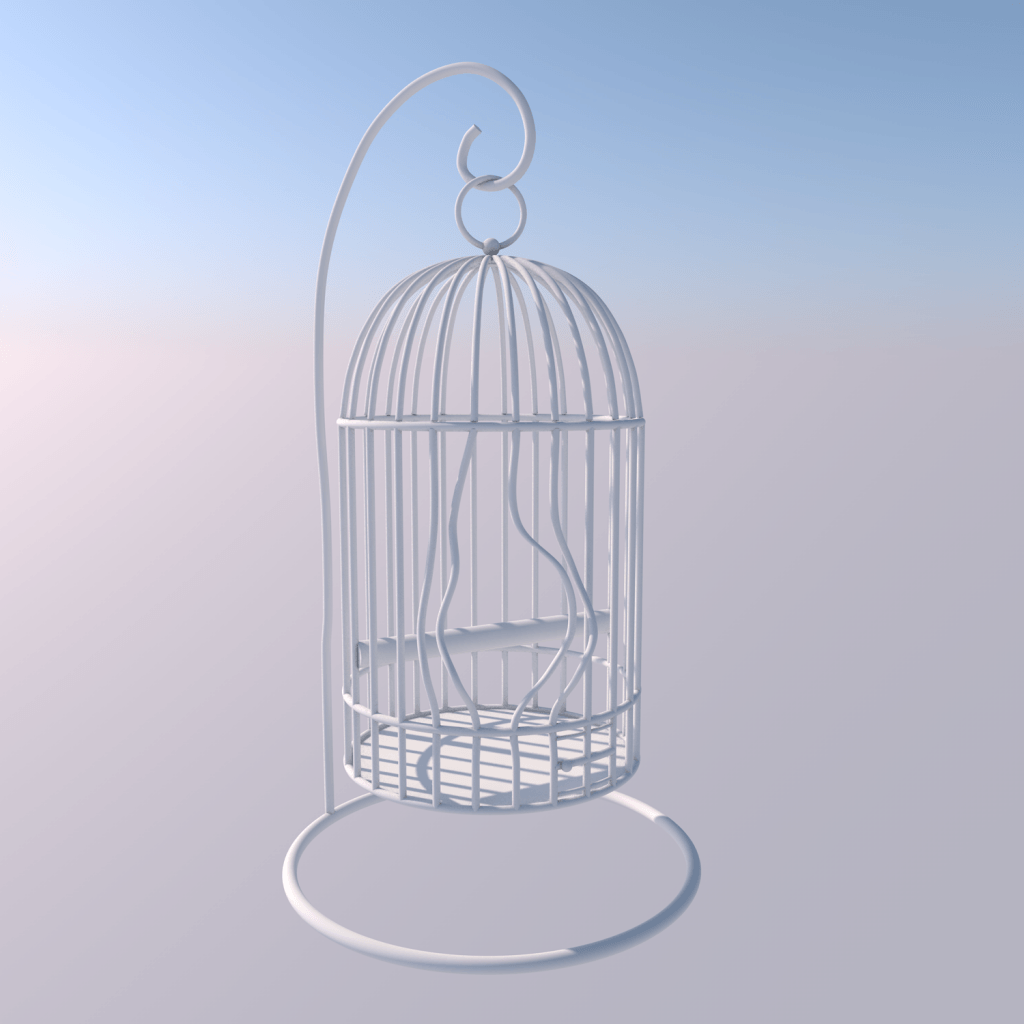
Chapter 3: Rodeo + Completed cage with feathers model

After creating the cage, which is a symbol of Travis Scott’s second studio album, I have taken a step back in the timeline of his musical releases and focused on the first album, which got him a major recognition – Rodeo. Approaching this model, I decided to focus on a simple, yet powerful concept. I also wanted to challenge myself again and try something complicated, like the owl and human face models. This lead me to an idea of making a skull of a bull, which has an obvious reference to the rodeo.

Like in the cases of owl and human head model, I started off with a plain, giving it an extremely basic shape. I found a good video, which served me as a point of reference:

I took screenshots and put them in the appropriate perspective windows. I used the top perspective for more tricky angles, which resulted in a higher accuracy:

Zrzut ekranu 2018-04-08 o 01.27.34 Zrzut ekranu 2018-04-08 o 01.27.44

Here’s my table of contents for this model: Symmetry and Subdivision Surface + Loft tool for the horn (with circles as the main structure) and cubes with adjusted shapes for the teeth.

Zrzut ekranu 2018-04-08 o 00.56.43

Low poly version of the model (I applied loop cuts on the basic plain, to make the model more flexible for the adjustments):

Zrzut ekranu 2018-04-08 o 00.57.11

Subdivision Surface (2 steps):

Zrzut ekranu 2018-04-08 o 00.57.27

Refined model rendered with a studio lighting and glossy material:

BULLSKULL

As mentioned in the title, I have also arranged a similar scene with the bird cage and feathers made previously. Although, I encountered an issue, as the barbs of the feathers wouldn’t render, but I quickly fixed it finding out that it is necessary to turn the hair option on in the render settings:

cagee

I have now two models to finish – Days Before Rodeo mixtape model and a representation of his upcoming and most important album in the entire career – Astroworld. After that, I can move onto creating a scene with appropriate lighting and emissive particles, which can be used for each of the models. This brings me closer to refining the final designs.

Chapter 4: Birds in the Trap Sing McKnight #2 – Feathers

After creating the first part of the model – the cage – I moved onto learning how to make feathers in C4D.


1. Building a spline (base of the feather)

2. Simulate -> Hair Objects -> Feathers Object

3. Make spline a child of the Feathers Object

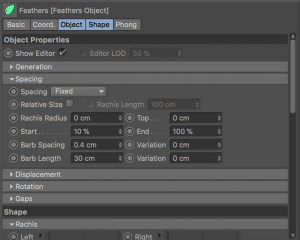
4. The core of the feather is called Rachis and the side parts (stuck together by Rachis) are called Barbs. It’s important to know, as those are the terms used in settings menu:

Zrzut ekranu 2018-03-23 o 15.21.54

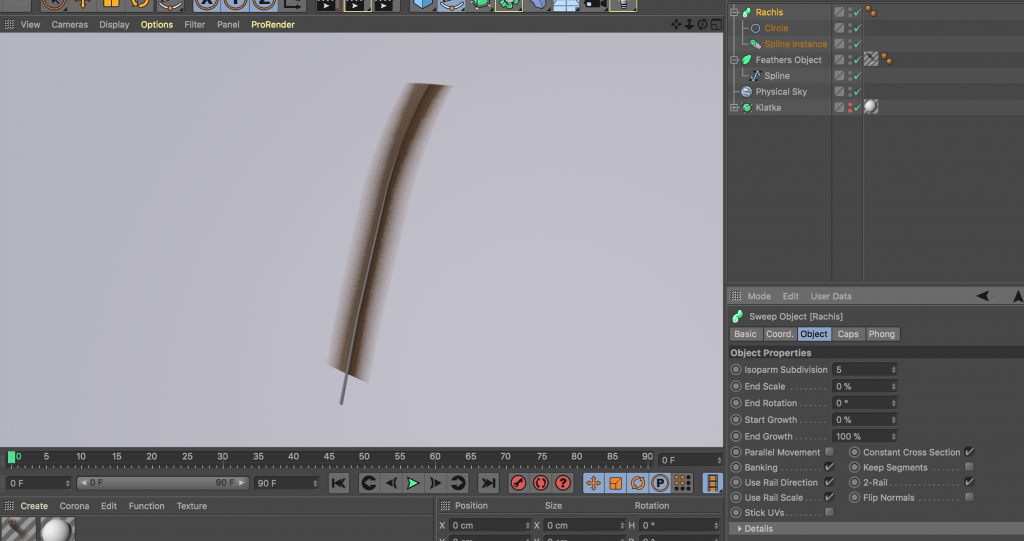
5. Create Sweep and sweep a circle along the spline.

6. Create Spline Instance with the original spline selected. It will automatically put it as a reference.

Zrzut ekranu 2018-03-23 o 15.40.30

7. Bring the End Scale to 0 in Sweep settings to make the basis “fade” as it goes up the feather.

8. By pressing Cmd + click on the Cross and Curve selection curves, enables both barbs to bend in different directions in Z and Y axis (in this order).

9. If you go back to the displacement section, you can now operate on the curves and you have created.

10. The rest of the sections allow further adjustments, such like gaps between the barbs (+ the frequency of them)

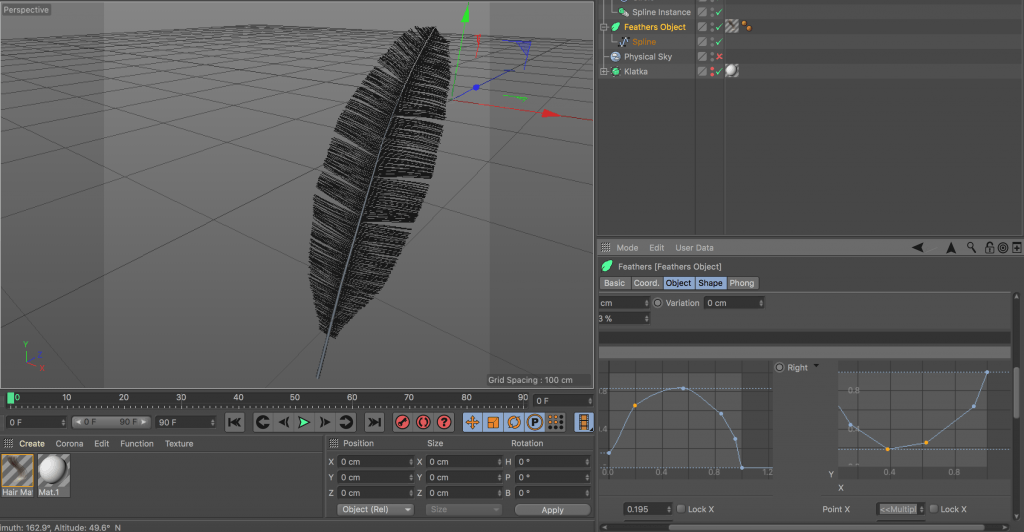
11. The last important part is the shape forming to add realism, which can be done within the two Left and Right graphs:

Zrzut ekranu 2018-03-26 o 00.43.24

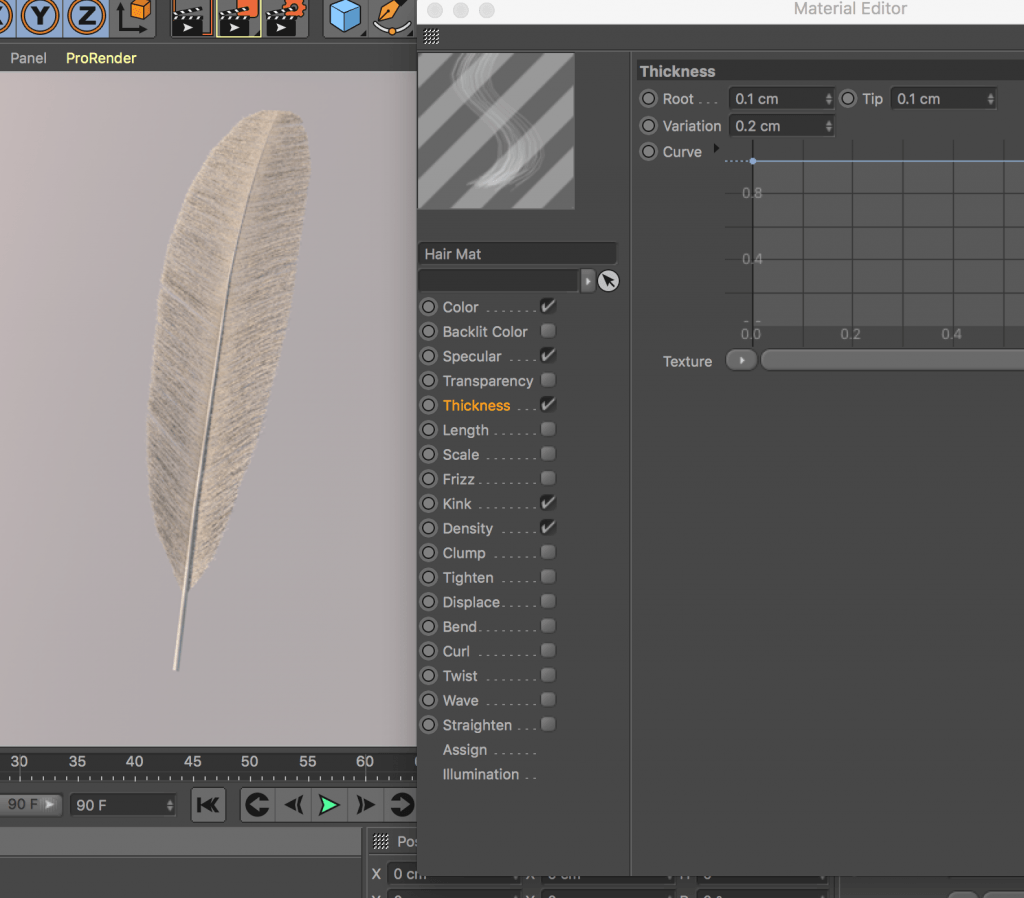
12. Hair (feather) material –  there are many options to tweak, which can completely change the look of the feather. I reduced the Specular and experimented with values like thickness, kink and density.

Zrzut ekranu 2018-03-26 o 14.32.41

Chapter 4: Birds in the Trap Sing McKnight #1

My project is very flexible in terms of the workflow, which allows me to jump between ideas an operate on different fields of the concept. I started working on Chapter 2: Days Before Rodeo, but during the process of planning and writing down/outlining possible options, I came up with a good 3D model design for chapter 4 (second studio album): “Birds in the Trap Sing McKnight”. The vision for this is based on an old-fashioned bird cage, with bent bars, as if something escaped from it. There will be smoke and feathers coming from the inside of the cage. The smoke will most likely be applied in Photoshop in the post-rendering stage.

Luckily, due to the amount of practice beforehand, I became familiar with methods and techniques, which perfectly apply to this model.

birds cage

Most vertical bars are simply made of cylinders and connected with the Cloner Effector, which sets them up in a circular pattern when right values are applied.

Loft tool with a circle spline attached, allows to copy the shape and progressively place and rotate further segments. Those segments can be then moved, but they remain attached to the rest of the structure, which results in the freedom of adjusting how the bars are bent. The more segments it consists of, the smoother the transition is. I simply moved around middle circles to “bend” the bars (same with the hook lifting the cage).

Established texturing workflow

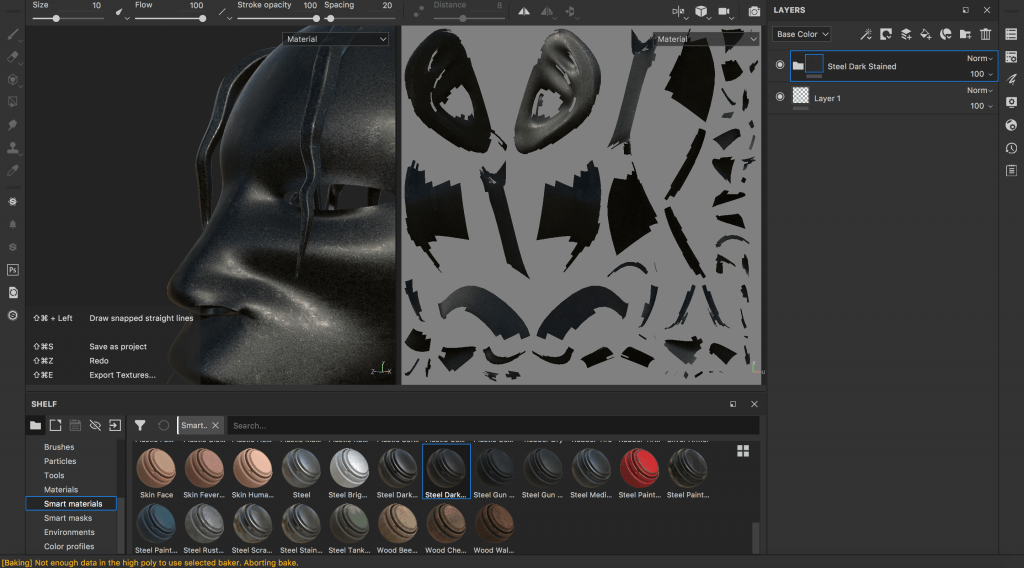
I’ve spent past 4 days on practicing and establishing my texturing workflow. The main point of operating within Substance Painter was to learn how to apply effective materials, but also to be able to bring them back to Cinema 4D, arrange the scene, light and other important elements. It took me some time and a few tutorials to decide what exactly I have to do to achieve it, but I finally figured out which steps will be essential.

1. Export a model from Cinema 4D into Substance Painter

2. Create/apply the texture within SP (baking the mesh map prior to that)

3. Export the textures as sets consisting of diffuse, glossiness, height, normal and specular

4. Go back to the model in Cinema 4D and create a material with appropriate channels

I exported the model in an .obj format with colour mapping to separate the head basis, ears and hair. One of the smart materials available in Substance Painter turned out to be great for my model purposes and a subtle alteration of it could be what I use in my final composition. It is called Steel Dark Stained and greatly represents the dark/mysterious vibe that I will be aiming for (dark material contrasting with emissive lights). After seeing how good  it looks on the model, I decided to leave out the crystal material idea, as it would be too time consuming.

Zrzut ekranu 2018-03-20 o 22.38.33

There was one great tutorial, which helped me to solve all my problems with fitting exported materials into correct channels:

I took screenshots of all necessary steps:

Zrzut ekranu 2018-03-20 o 23.29.30 Zrzut ekranu 2018-03-20 o 23.30.31Zrzut ekranu 2018-03-20 o 23.31.08Zrzut ekranu 2018-03-20 o 23.32.06  Zrzut ekranu 2018-03-20 o 23.32.35

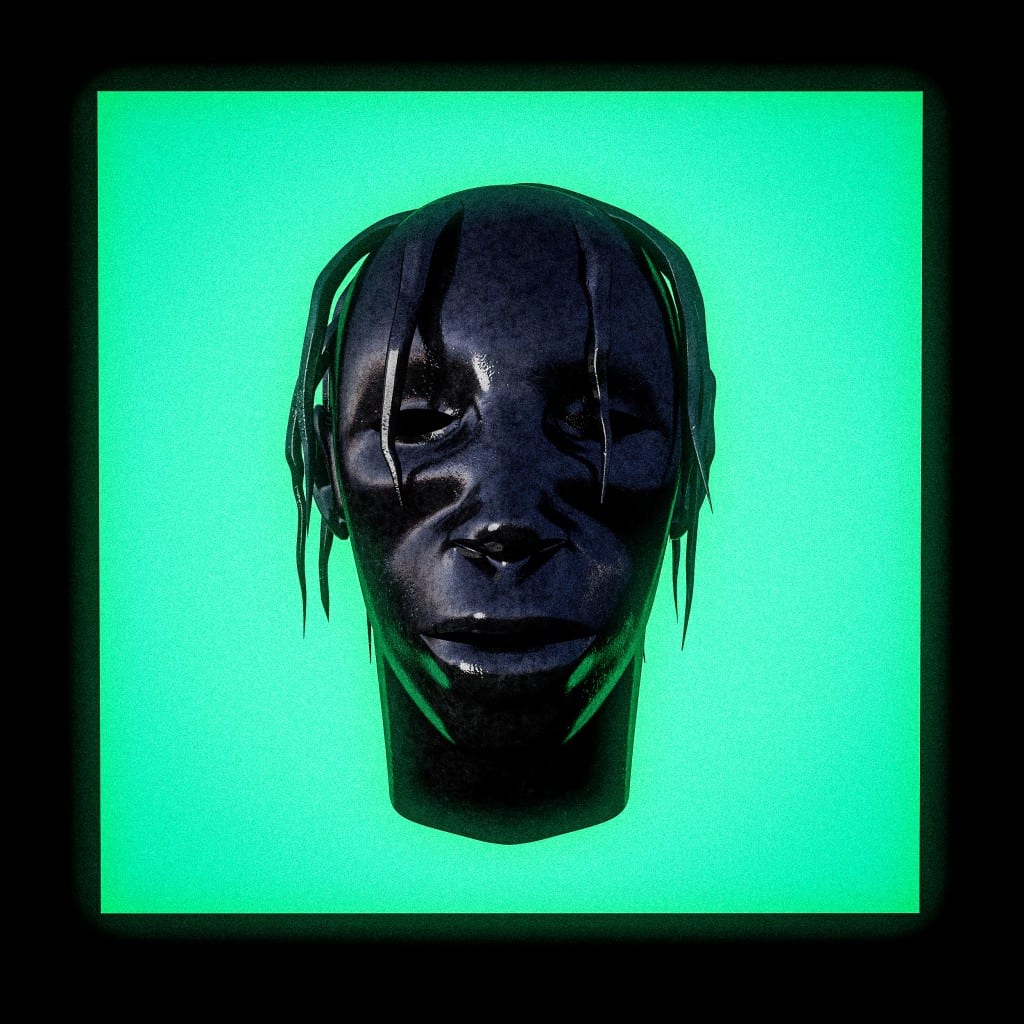
Material came out really well and I contrasted it with an emissive source of light from behind, a dark HDR map and a disc with luminance channel from the front. The final render was retouched in Adobe Lightroom:

Travis Dark Metal

The process of texturing was really important for my models. Knowing that I’m now capable of applying realistic materials and converting them back to Cinema 4D allows me to focus on the rest of 3D models.

It’s worth mentioning that I have also found a Substance Painter plugin for C4D, which allows me to quickly open SP assets and convert them into C4D materials. Although the workflow explained above provides much better results, as it breaks down the UV maps.

Substance Painter: first steps

As I have finally fixed the issue with my model import, it’s time to learn how to use Substance Painter. Luckily, just before I started, a new version has been released, which makes the tools and menu look much more simple. Alongside the new version, a set of tutorials came out too, and they are the ones that will help me get through the first stages and understanding the software.

01 – Creating and setting up a project

The first video focused on the navigation around the software. This included moving the object and the environment to experiment with lights and shadows (displays settings). It also explained the Texture set list and changing the shaders.

Shift + right mouse button – rotating the HDR environment

02 – Baking maps used in the texturing process

(to make sure what exactly texture baking is, I found a great explanation on a Blender forum):

“Baking” generally refers to the process of recording as an image, some aspect of the Material or Mesh characteristics of a model. One value of this is that certain kinds of Material parameters can take longer to compute and apply to a model than an Image Texture, so it saves rendering time. Baking is usually done once a Material or Mesh is finalized.

In texture baking, for example, what is originally a procedural texture can be recorded as an image. Sometimes various “channels” of a material can be consolidated into a single image, simplifying the number of texture images used. Material colors applied in Texture Paint mode can be saved to an image. Texture baking can also help with disguising seams on a UV unwrap, a somewhat complicated but very useful process.

In normal baking, the mesh normals (which affect how light appears to reflect from the model’s surface) can be recorded — this results in very specialized images with RGB values based on normal vectors.

Usually baking requires having the model UV-unwrapped and -mapped, so the resulting image is properly fit to the model.

Just FYI, there are other types of “baking” employed in physics sims and animation, where the action of a mesh that is computed frame-by-frame by physics math (which can be very slow) is recorded (baked) to a set of keyframes that display much faster than the full sim. In NLA (non-linear animation), a sequence that is composed of many short “strips” of animation combined to produce a full sequence can be “baked” to a single set of composite keyframes.

The second part presented the correct baking settings.

Some notes I’ve made:

In texture set settings -> bake mesh maps

Normal unticked, as we are using a high poly mesh in the tutorial (and so am I), also disable thickness

Output size to 2k

ID settings -> Change from vertex colour to material colour

Apply to all button, so we dont just apply the changes to the only set we have selected

Setting a mesh for a high definition mesh after clicking Common

Baking IDs that we can use in the texturing process to quickly create mask based on ID map

Using second version of mesh that contains the material IDs that we want to use to bake this ID map

Shift + B cycle through the maps for a preview

M – material mode

Projection errors fix: Texture set settings -> Bake mesh maps -> (doesn’t matter which texture set is selected), scroll down to section called Match -> change Always to By mesh name (using high and low poly mesh suffix to split the mesh into groups of similar names – when the ray is traced, it only intersects with meshes  that match that name)