After creating the first part of the model – the cage – I moved onto learning how to make feathers in C4D.
1. Building a spline (base of the feather)
2. Simulate -> Hair Objects -> Feathers Object
3. Make spline a child of the Feathers Object
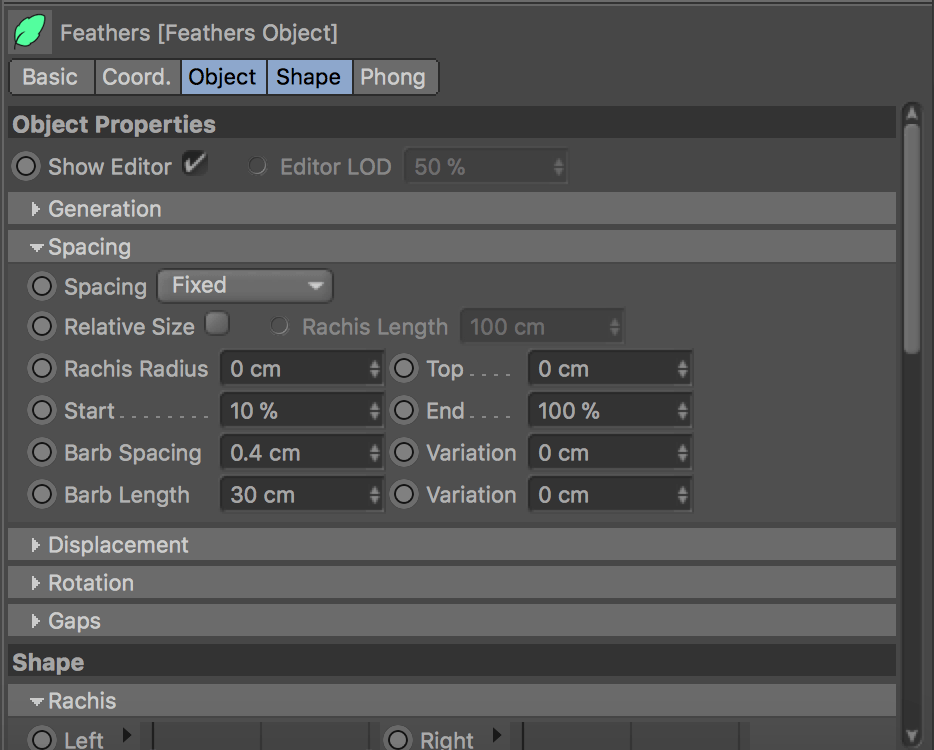
4. The core of the feather is called Rachis and the side parts (stuck together by Rachis) are called Barbs. It’s important to know, as those are the terms used in settings menu:
5. Create Sweep and sweep a circle along the spline.
6. Create Spline Instance with the original spline selected. It will automatically put it as a reference.
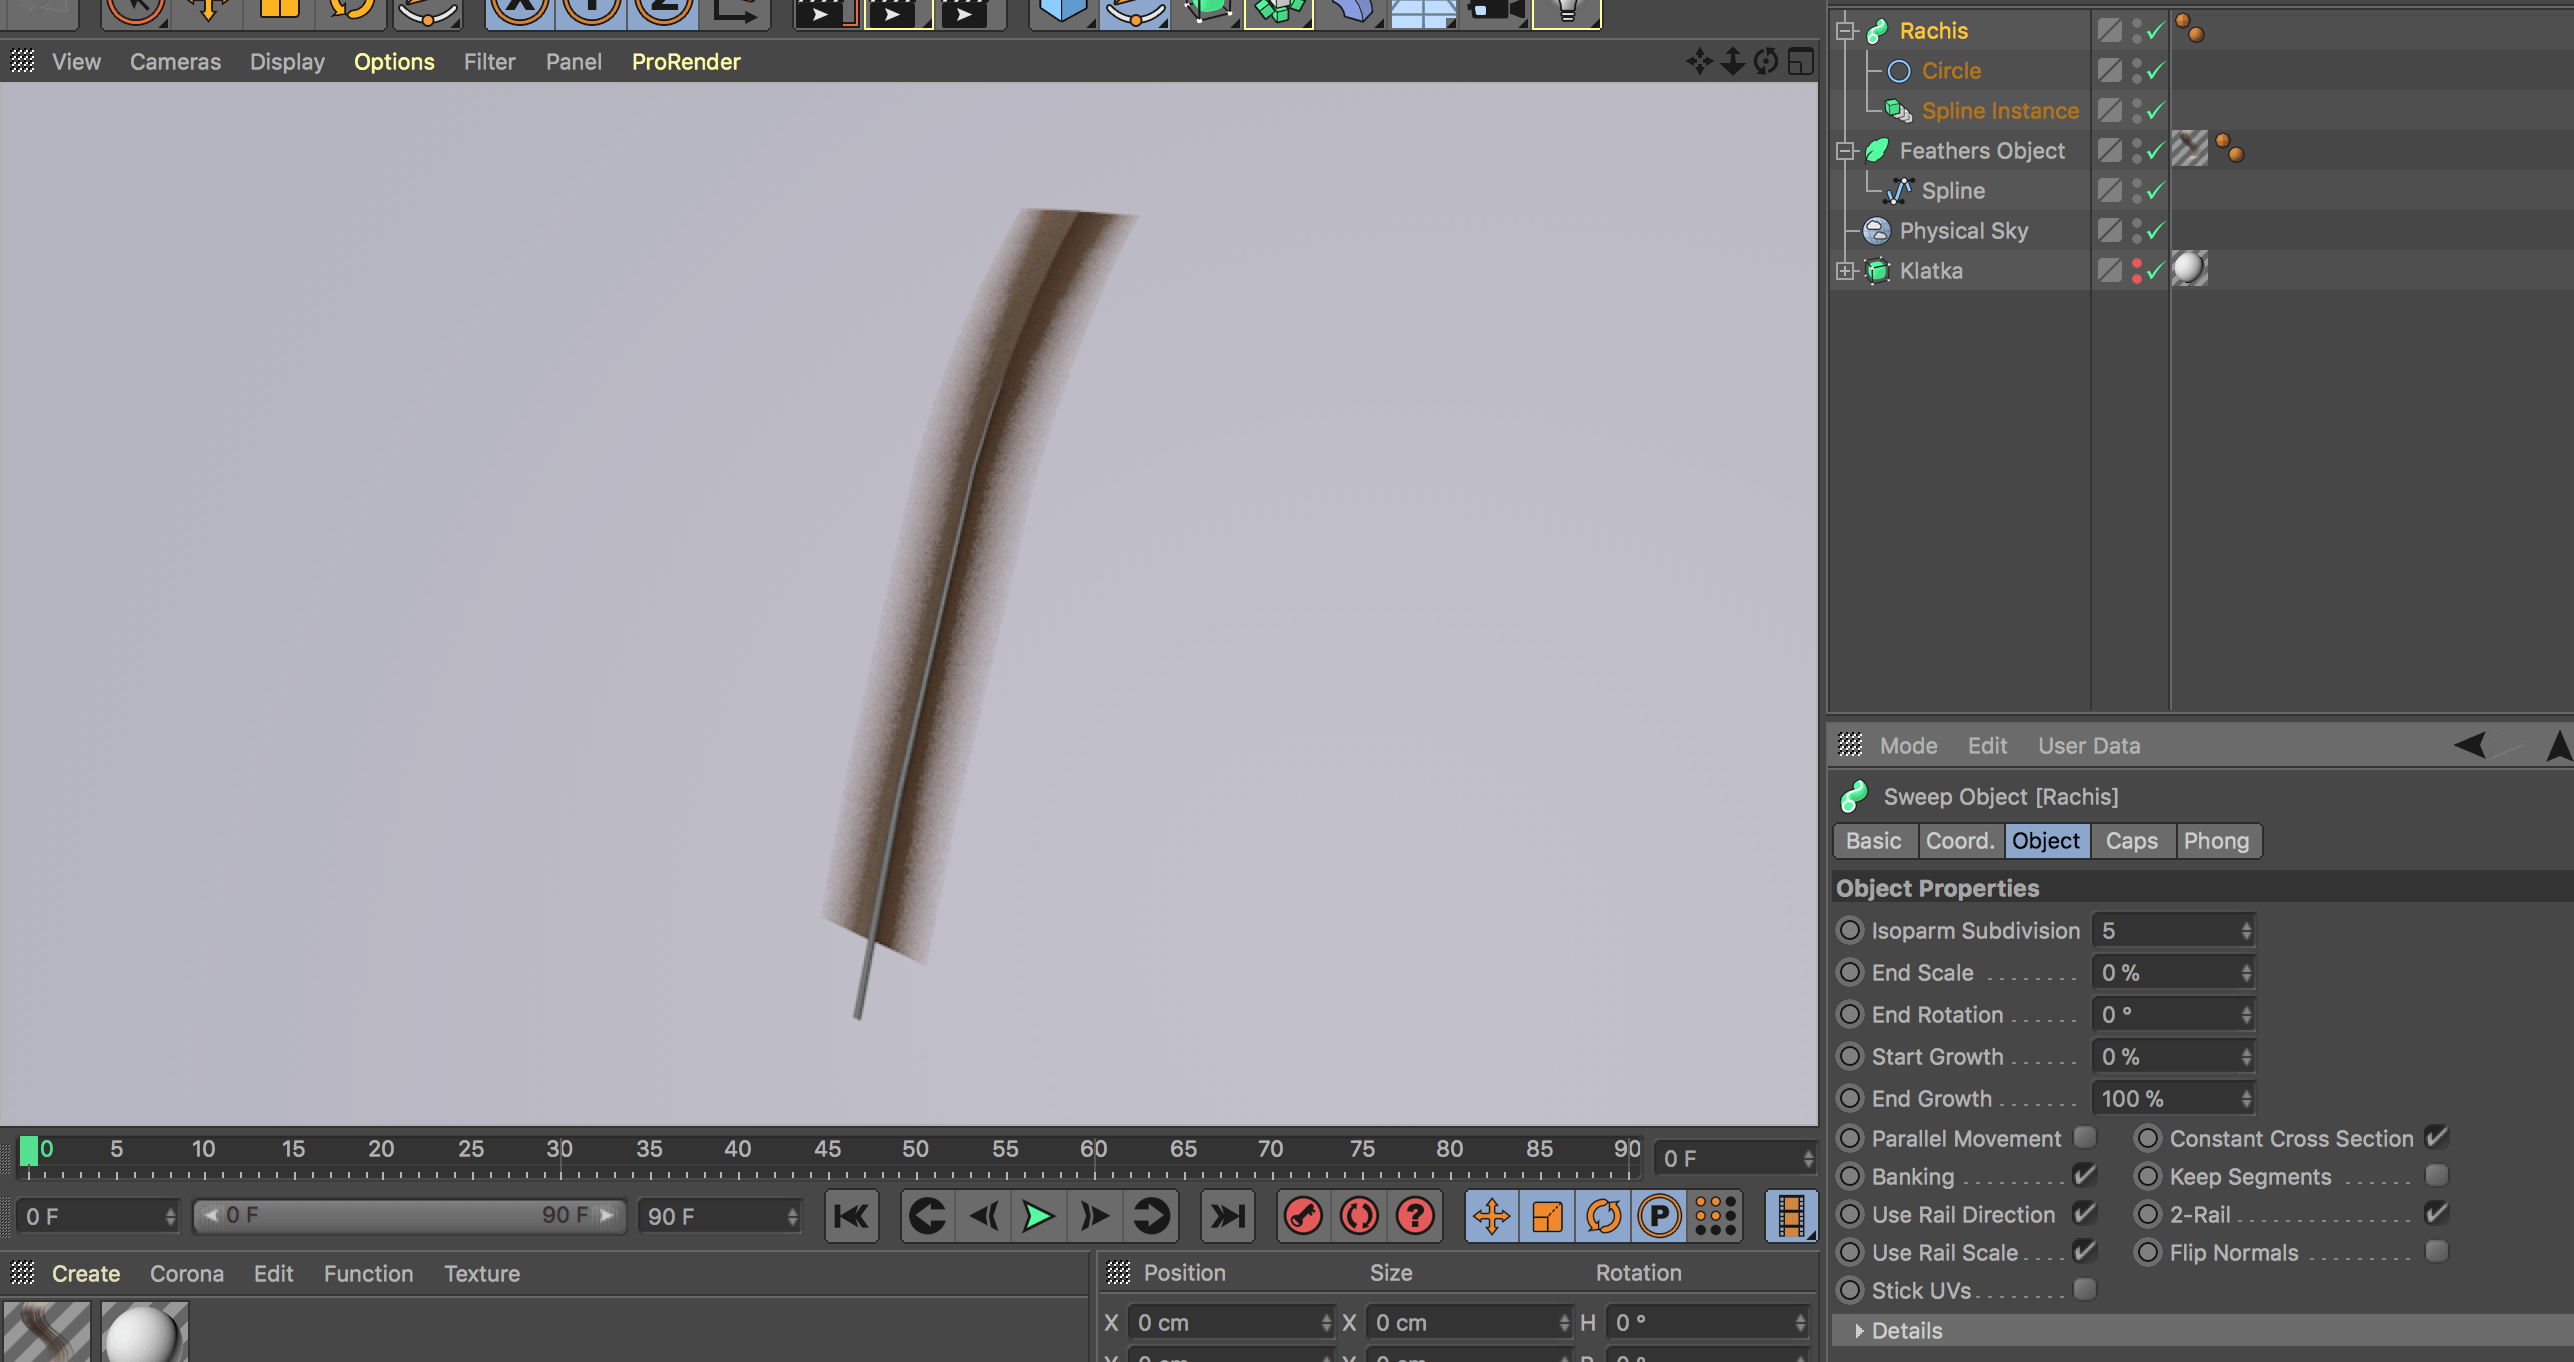
7. Bring the End Scale to 0 in Sweep settings to make the basis “fade” as it goes up the feather.
8. By pressing Cmd + click on the Cross and Curve selection curves, enables both barbs to bend in different directions in Z and Y axis (in this order).
9. If you go back to the displacement section, you can now operate on the curves and you have created.
10. The rest of the sections allow further adjustments, such like gaps between the barbs (+ the frequency of them)
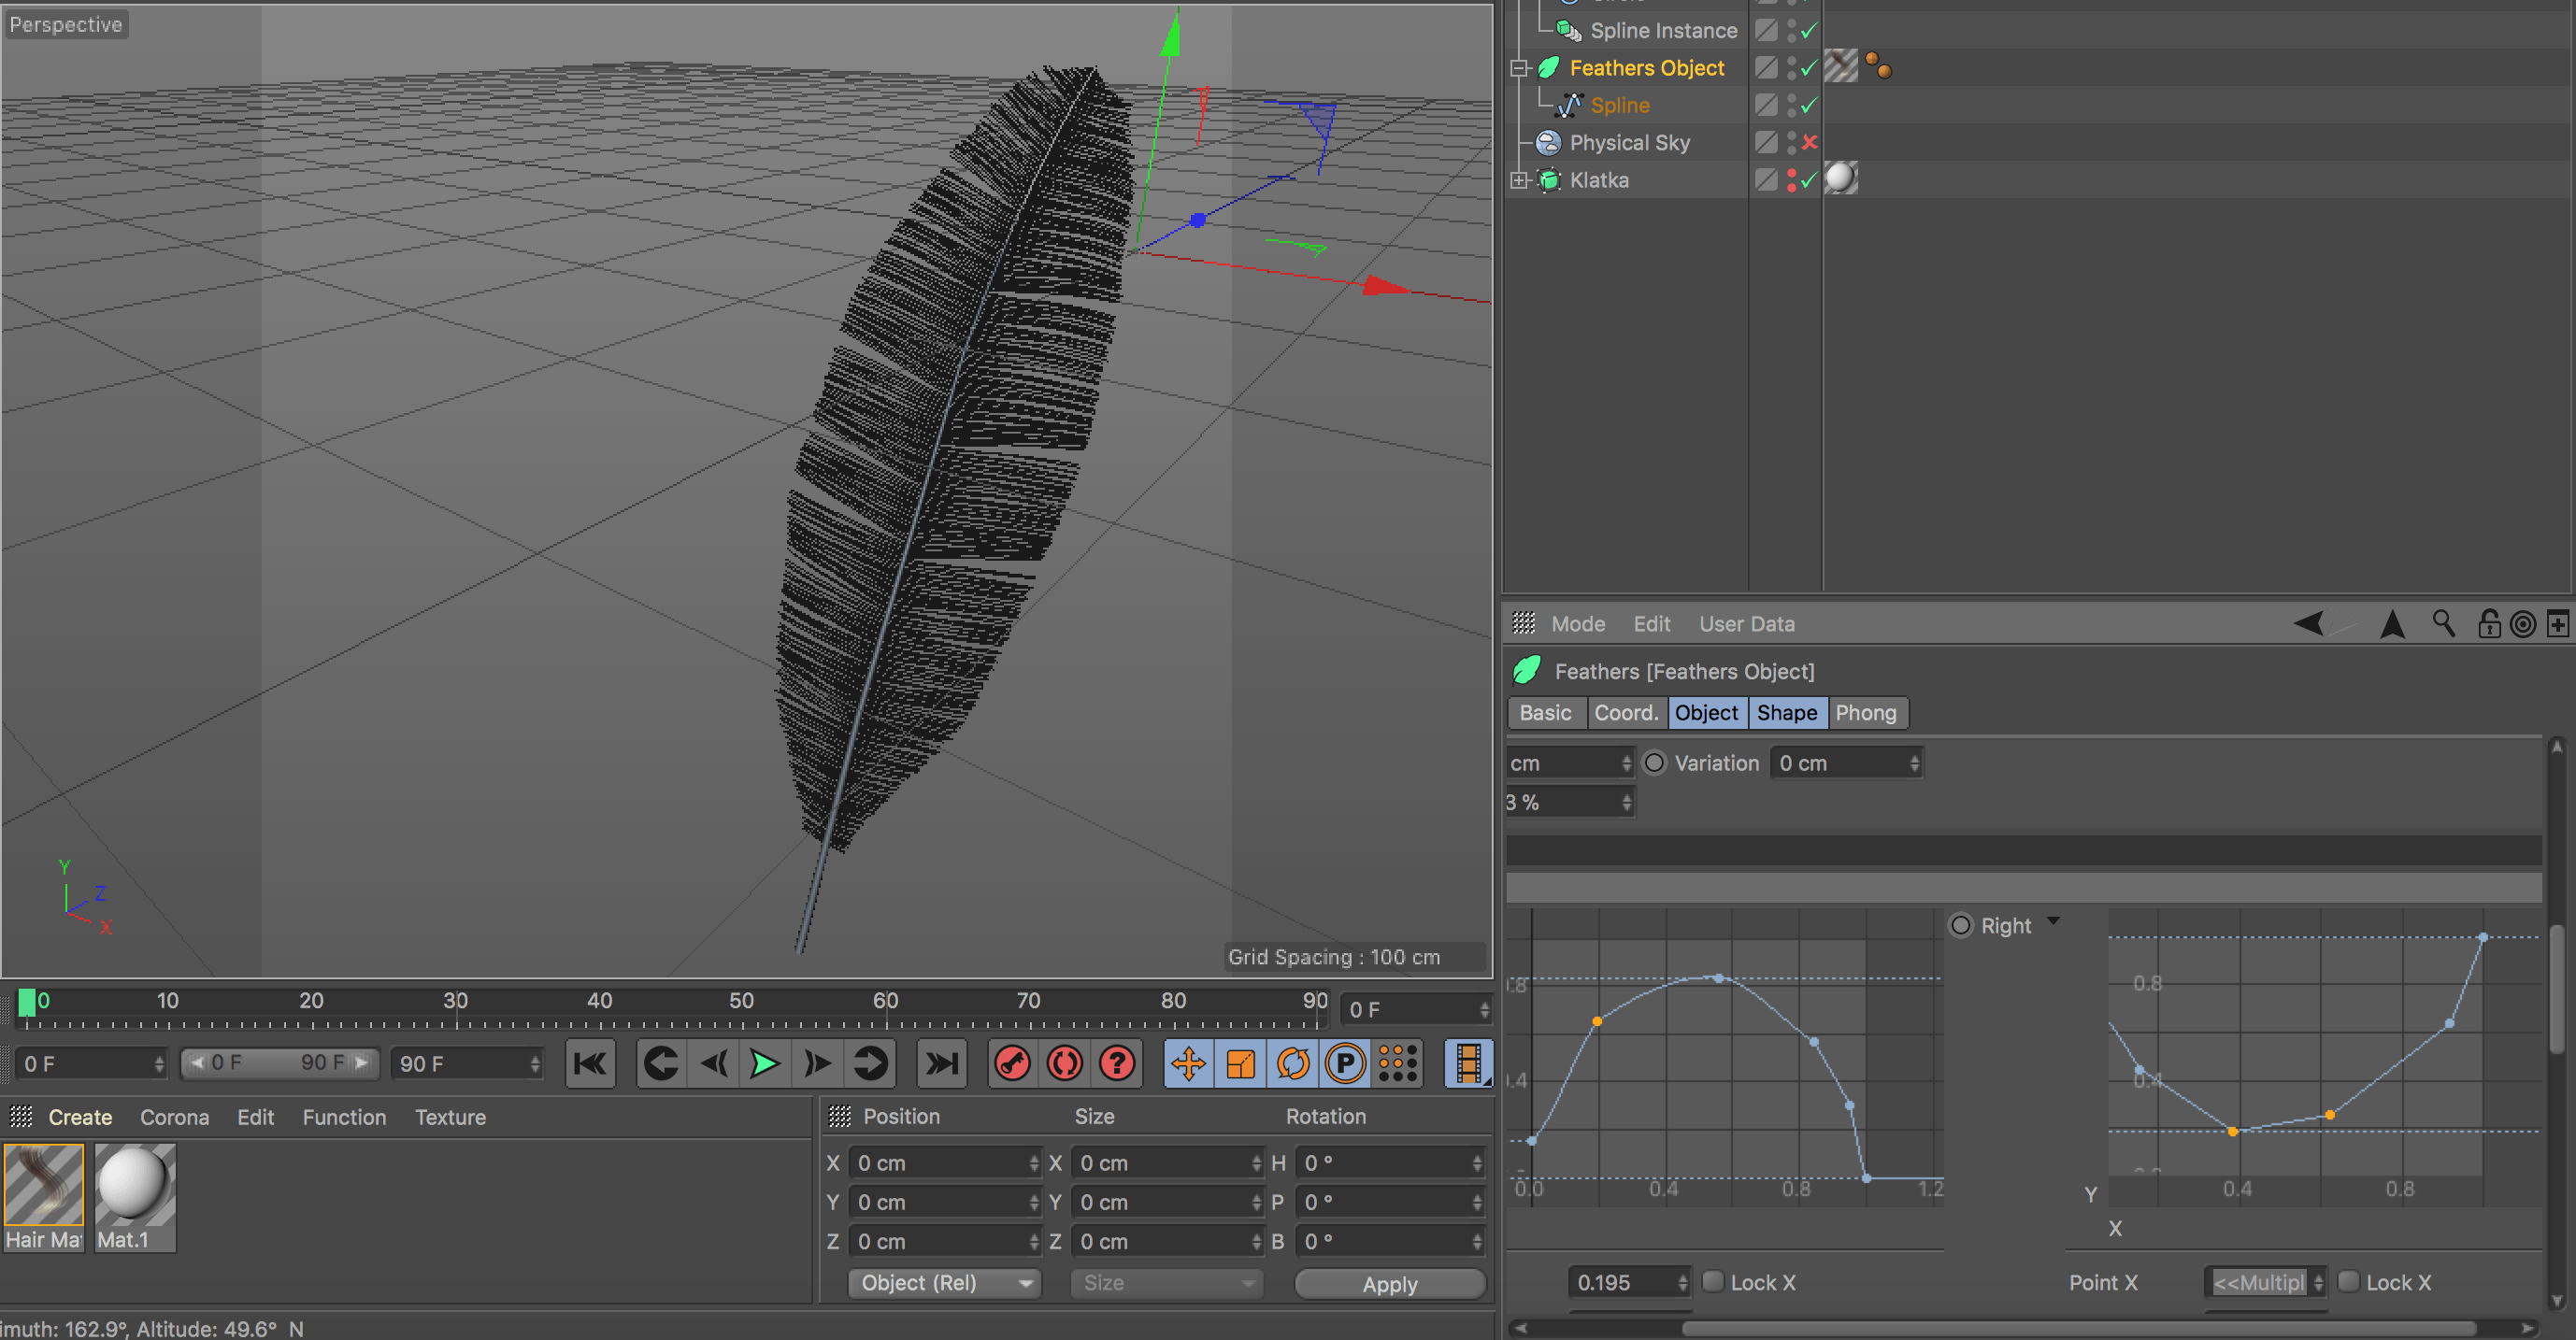
11. The last important part is the shape forming to add realism, which can be done within the two Left and Right graphs:
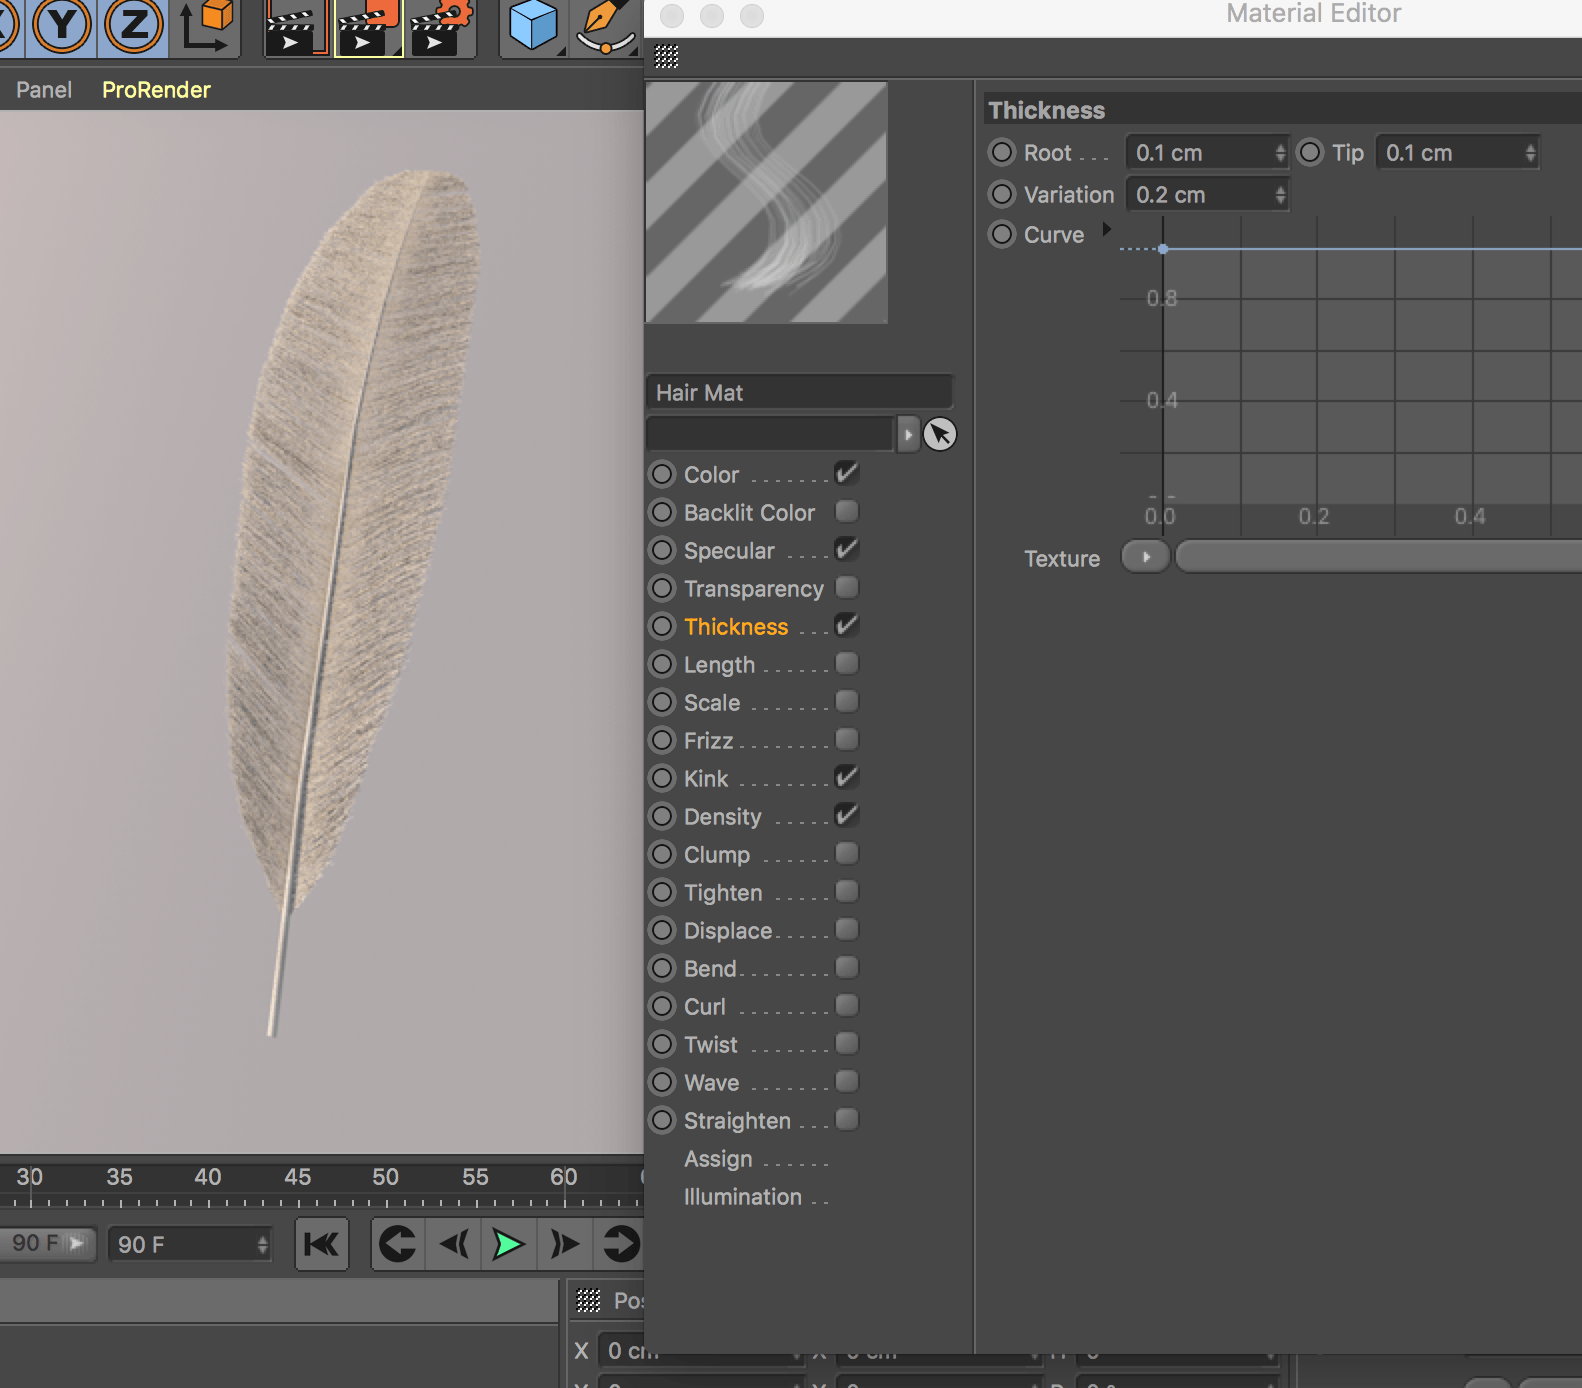
12. Hair (feather) material – there are many options to tweak, which can completely change the look of the feather. I reduced the Specular and experimented with values like thickness, kink and density.