Global Illumination + Emissive colour – part 1

Relating to my aims for this project, I got a new task of exploring the area of the emissive colour aspects. First of all, search results seemed to concentrate on emissive material feature in Unreal Engine. It worked exactly how I’d need it in Cinema 4D (making the object emit the light first and then adjusting how it affects the environment). Then, when I tried to specify it more into Cinema 4D results, the tutorials required Octane Render, which also has a similar feature, emissive colour.

I’ve decided to move emissive colour/material on the side for a second and firstly understand more basic structure of light. In one of the previous posts, I explained what types of light are available in 3D software, but I still wasn’t exactly sure about the definitions and meaning of terms like Global Illumination or Ambient Occlusion, so let’s explain that first.

SOURCE

Global Illumination = Ambient Light + Diffuse Light + Specular Light + Emissive Light

global_illumination

Light definitions

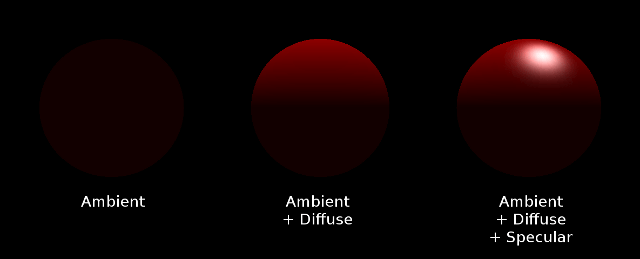
Each of these terms is explained in the source article, but in essence, realistic look involves all types of lighting balanced together.

Looking for all that information led me to an extremely useful discovery – helper built into Cinema 4D. It allows us to right click on pretty much any option or feature and get a detailed explanation of how it works with examples.

It helped me a lot to explain the difference between two different glows – material based and the one in render settings:

Do not confuse the Glow filter with the Glow channel for materials. Glowing materials always create glow, whereas the Glow filter adds glow according to the brightness of rendered pixels. Suppose you have a scene with no lighting— a glowing material would still generate glow, the Glow filter would not.

I also got a clear answer for what an Ambient Occlusion is:

Ambient Occlusion (AO) determines the degree to which each visible surface point is exposed and darkens it accordingly. Imagine a scene without a floor that is evenly lit by the sky surrounding it. For each visible area, AO will determine the degree to which it sees the sky (more precisely: the degree to which each visible point within a hemisphere (with adjustable radius) has an unobstructed view of the sky).

Knowing the basics of various types of lighting, I moved onto the main task: Emissive colour

As mentioned, first results were mainly Unreal Engine 4 related, but I thought it’s still worth having a look. In this particular video, emissive material didn’t light up the area around the object at first. It had to be set as a static source of light to start working like a real source of emissive light (such like a lightbulb).

I started wondering how to practice and study emissive colour within Cinema 4D and I found a few useful tutorials. The first, brief video explained how to use an object as a light.

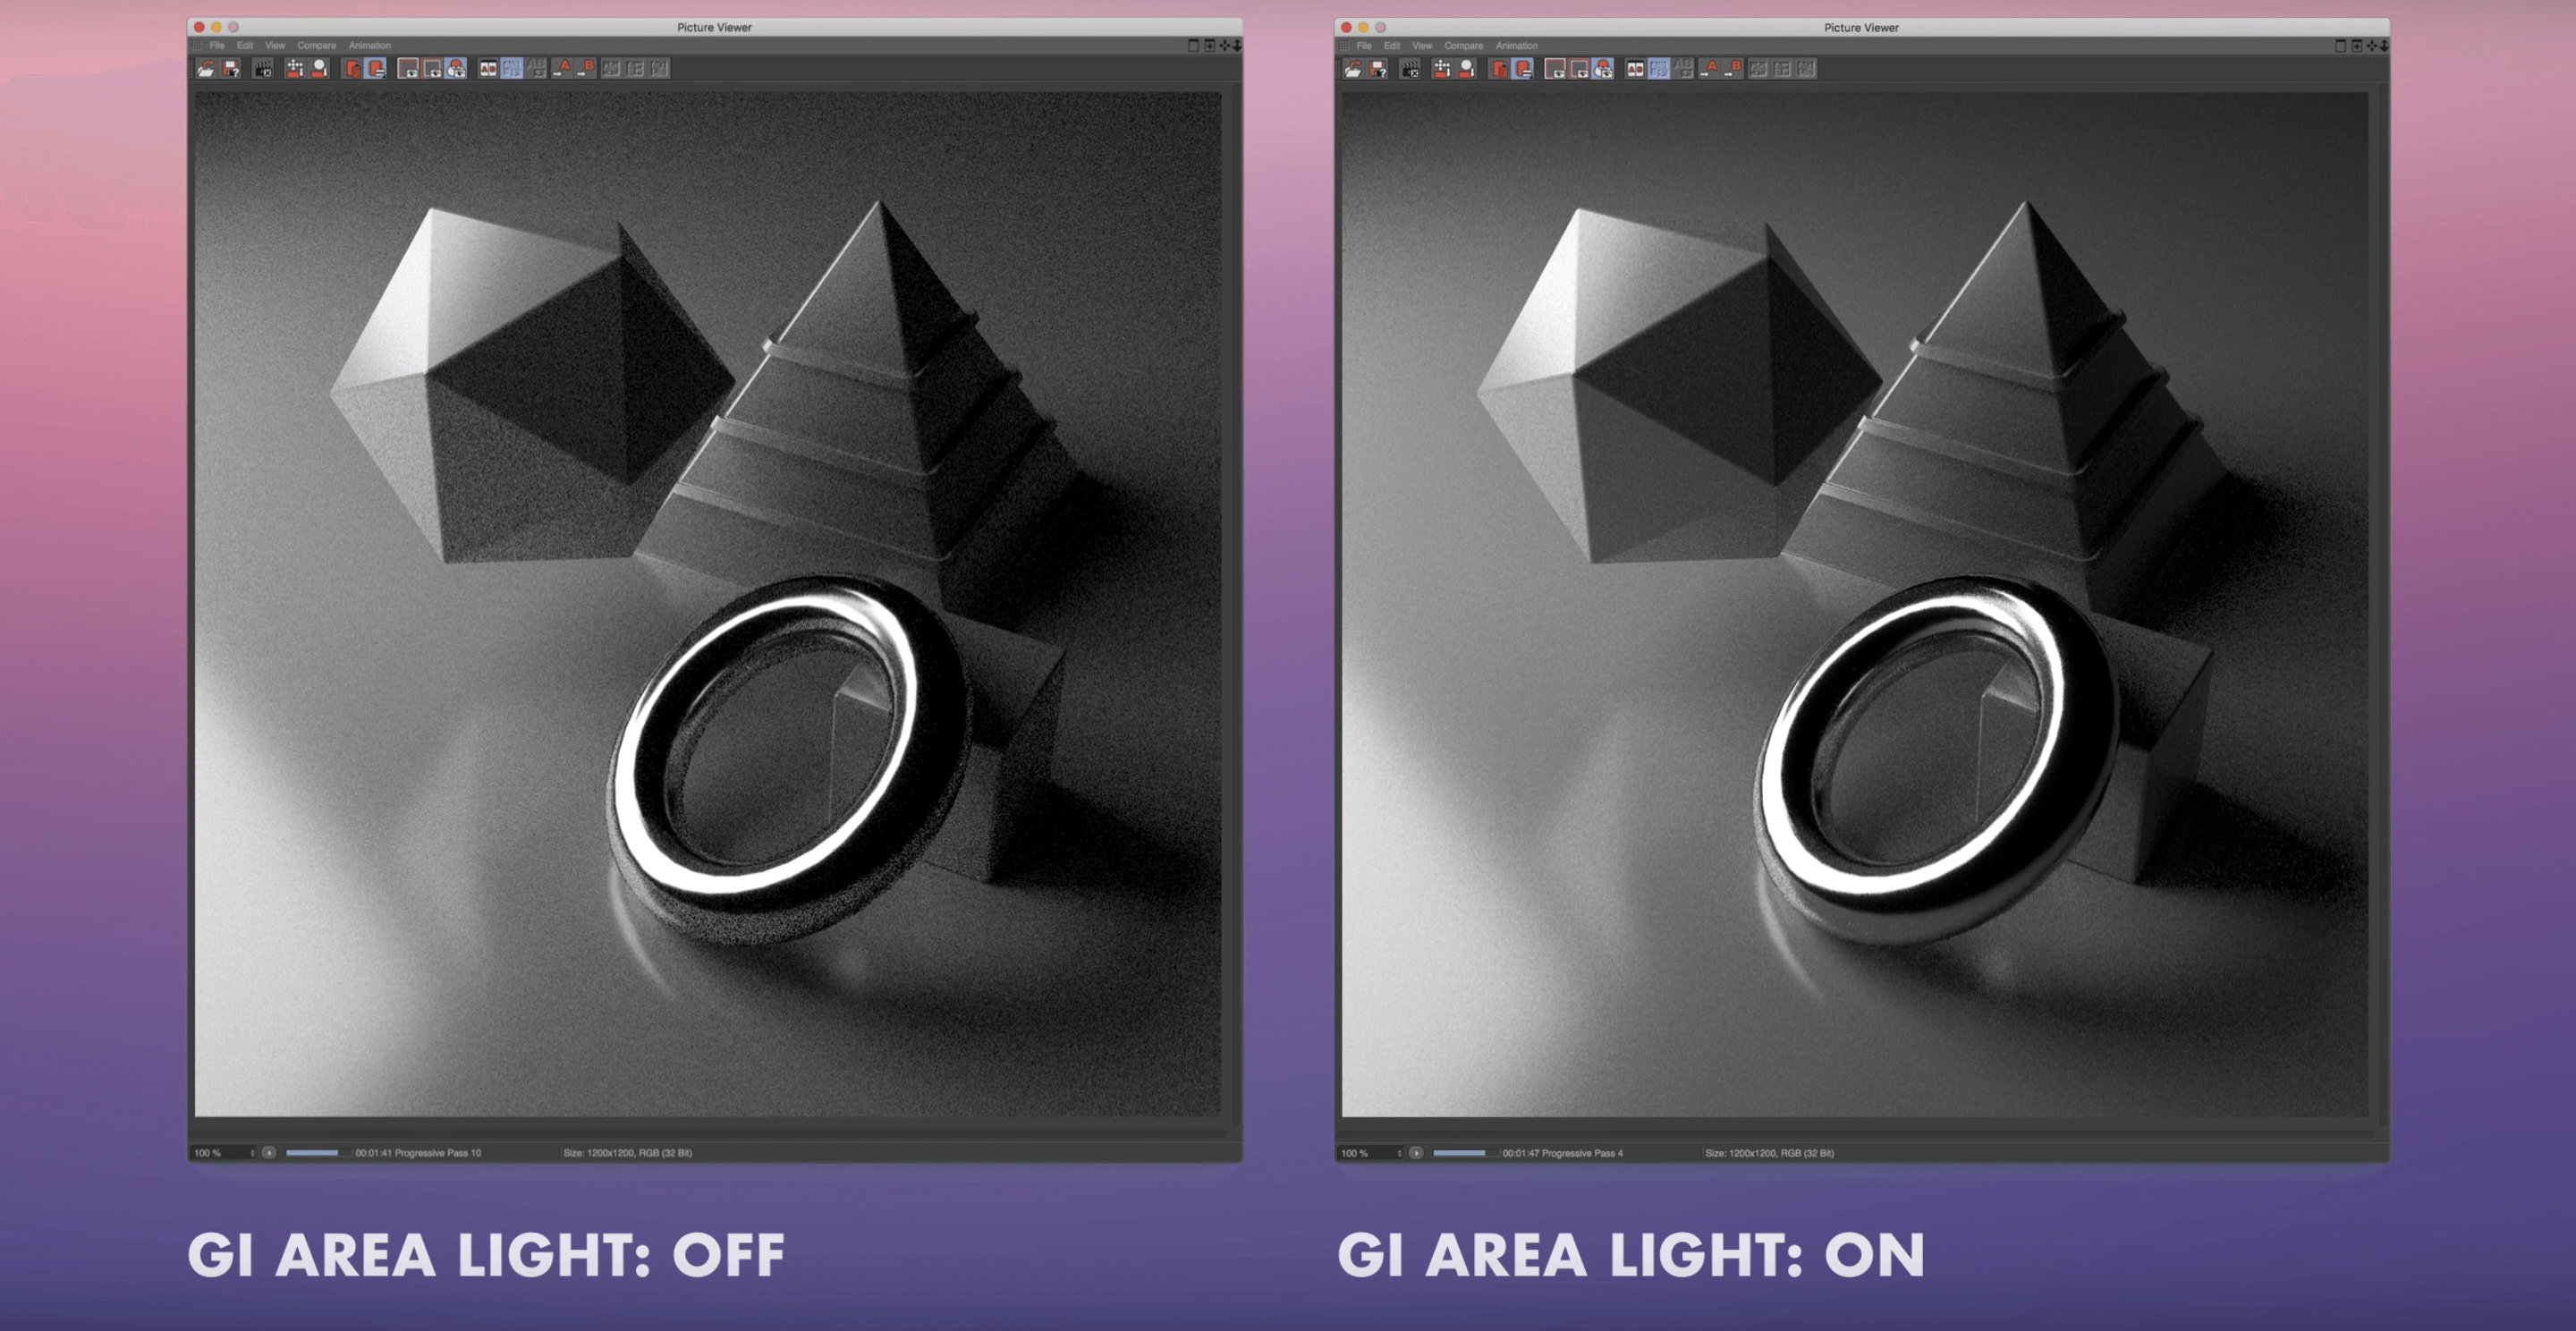
It was based on creating a regular object such like a cube, adding Global Illumination in Render Settings and applying luminance only material onto the cube. It also showed adding GI Area Light (which I’m yet to learn more about) in Illumination setting, which seemed to create a higher quality reflectance on the floor.

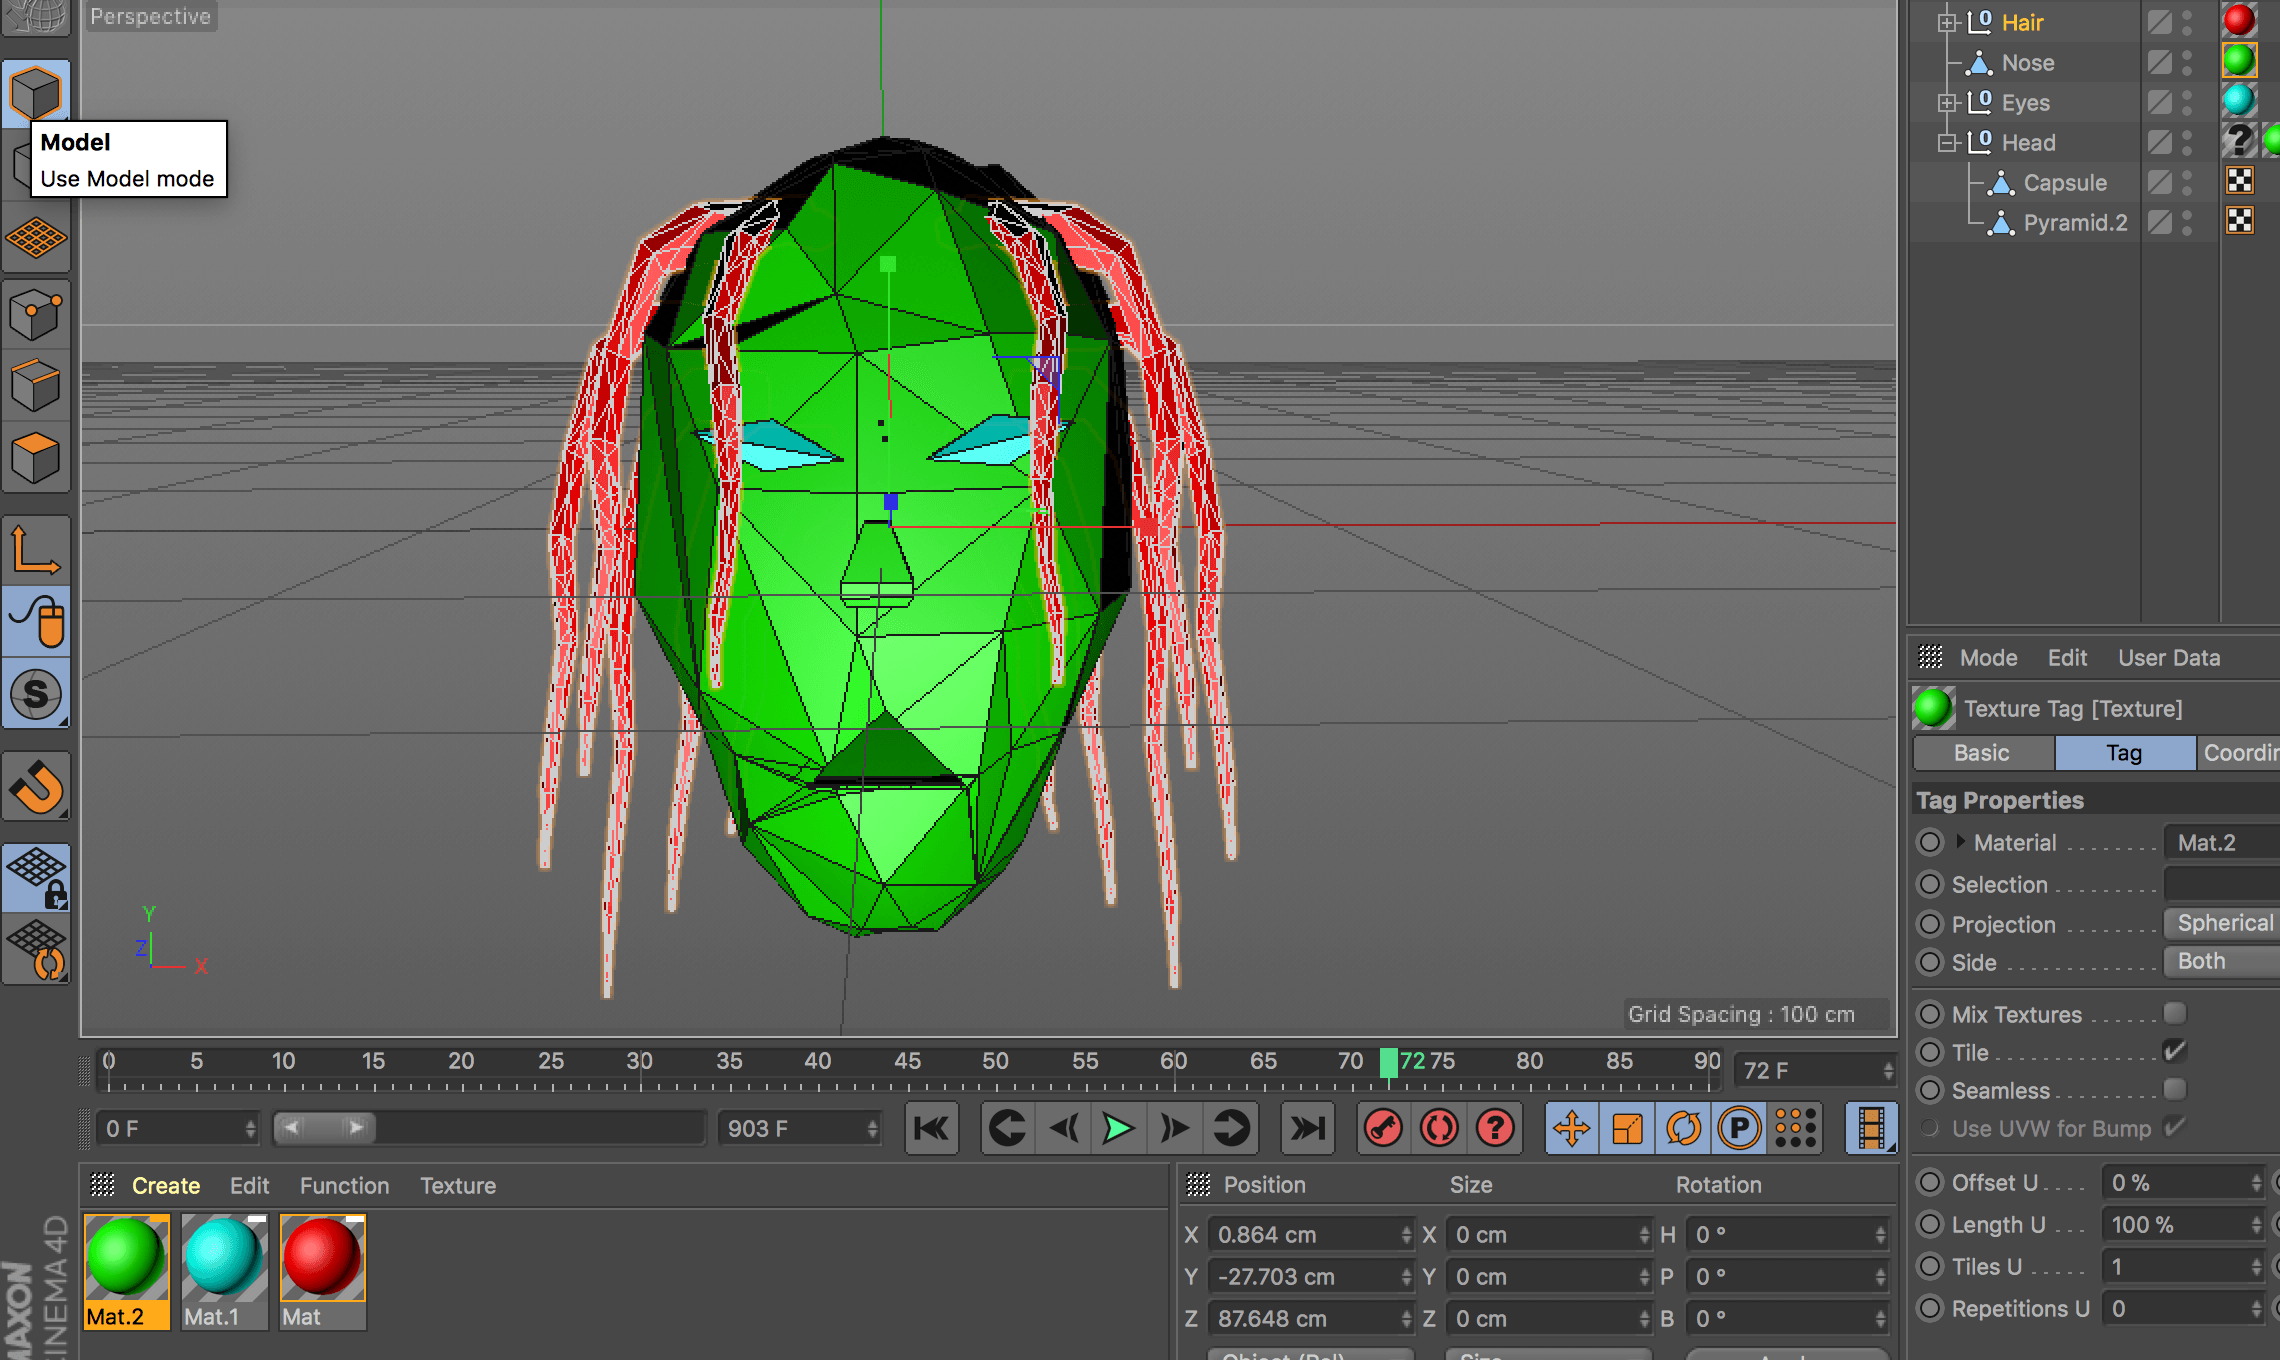
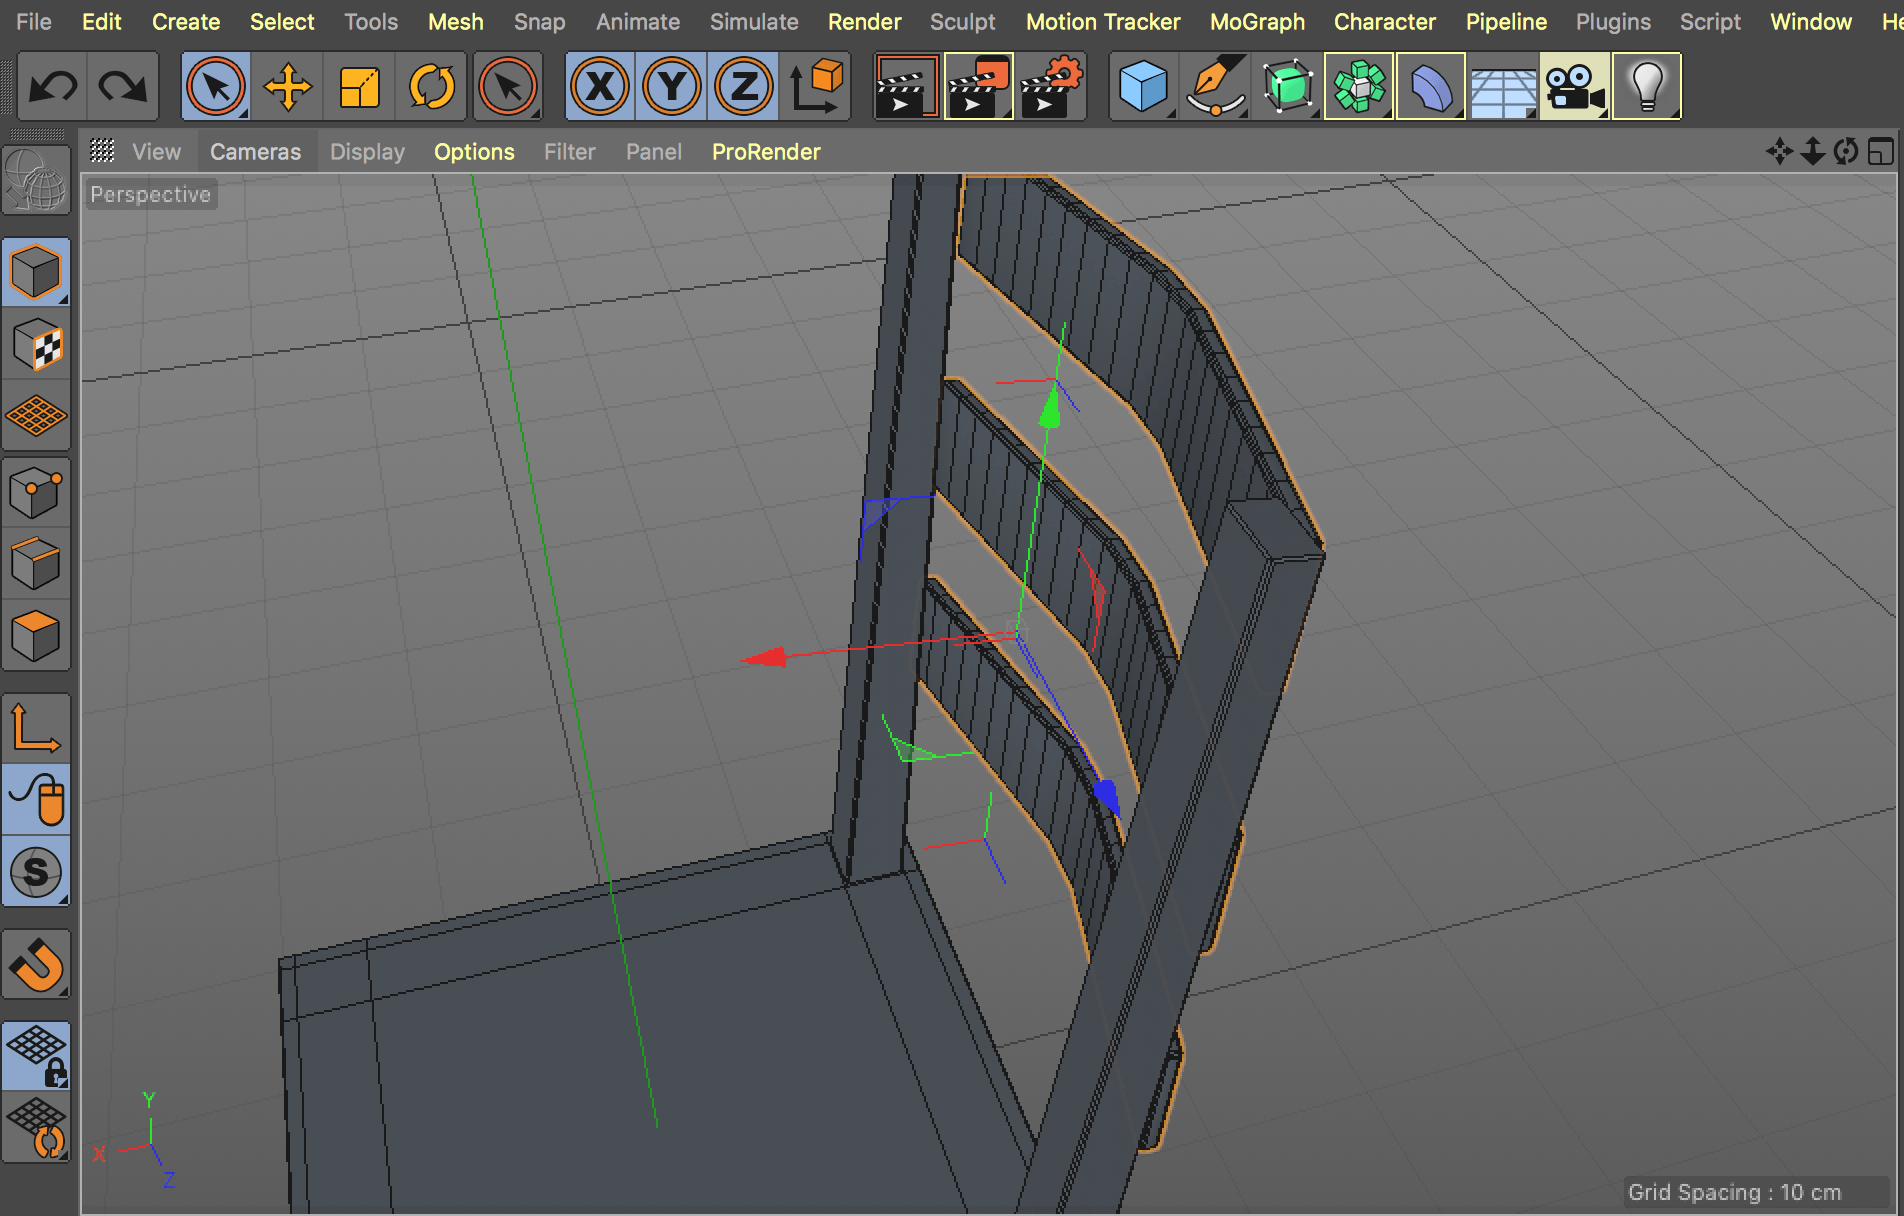
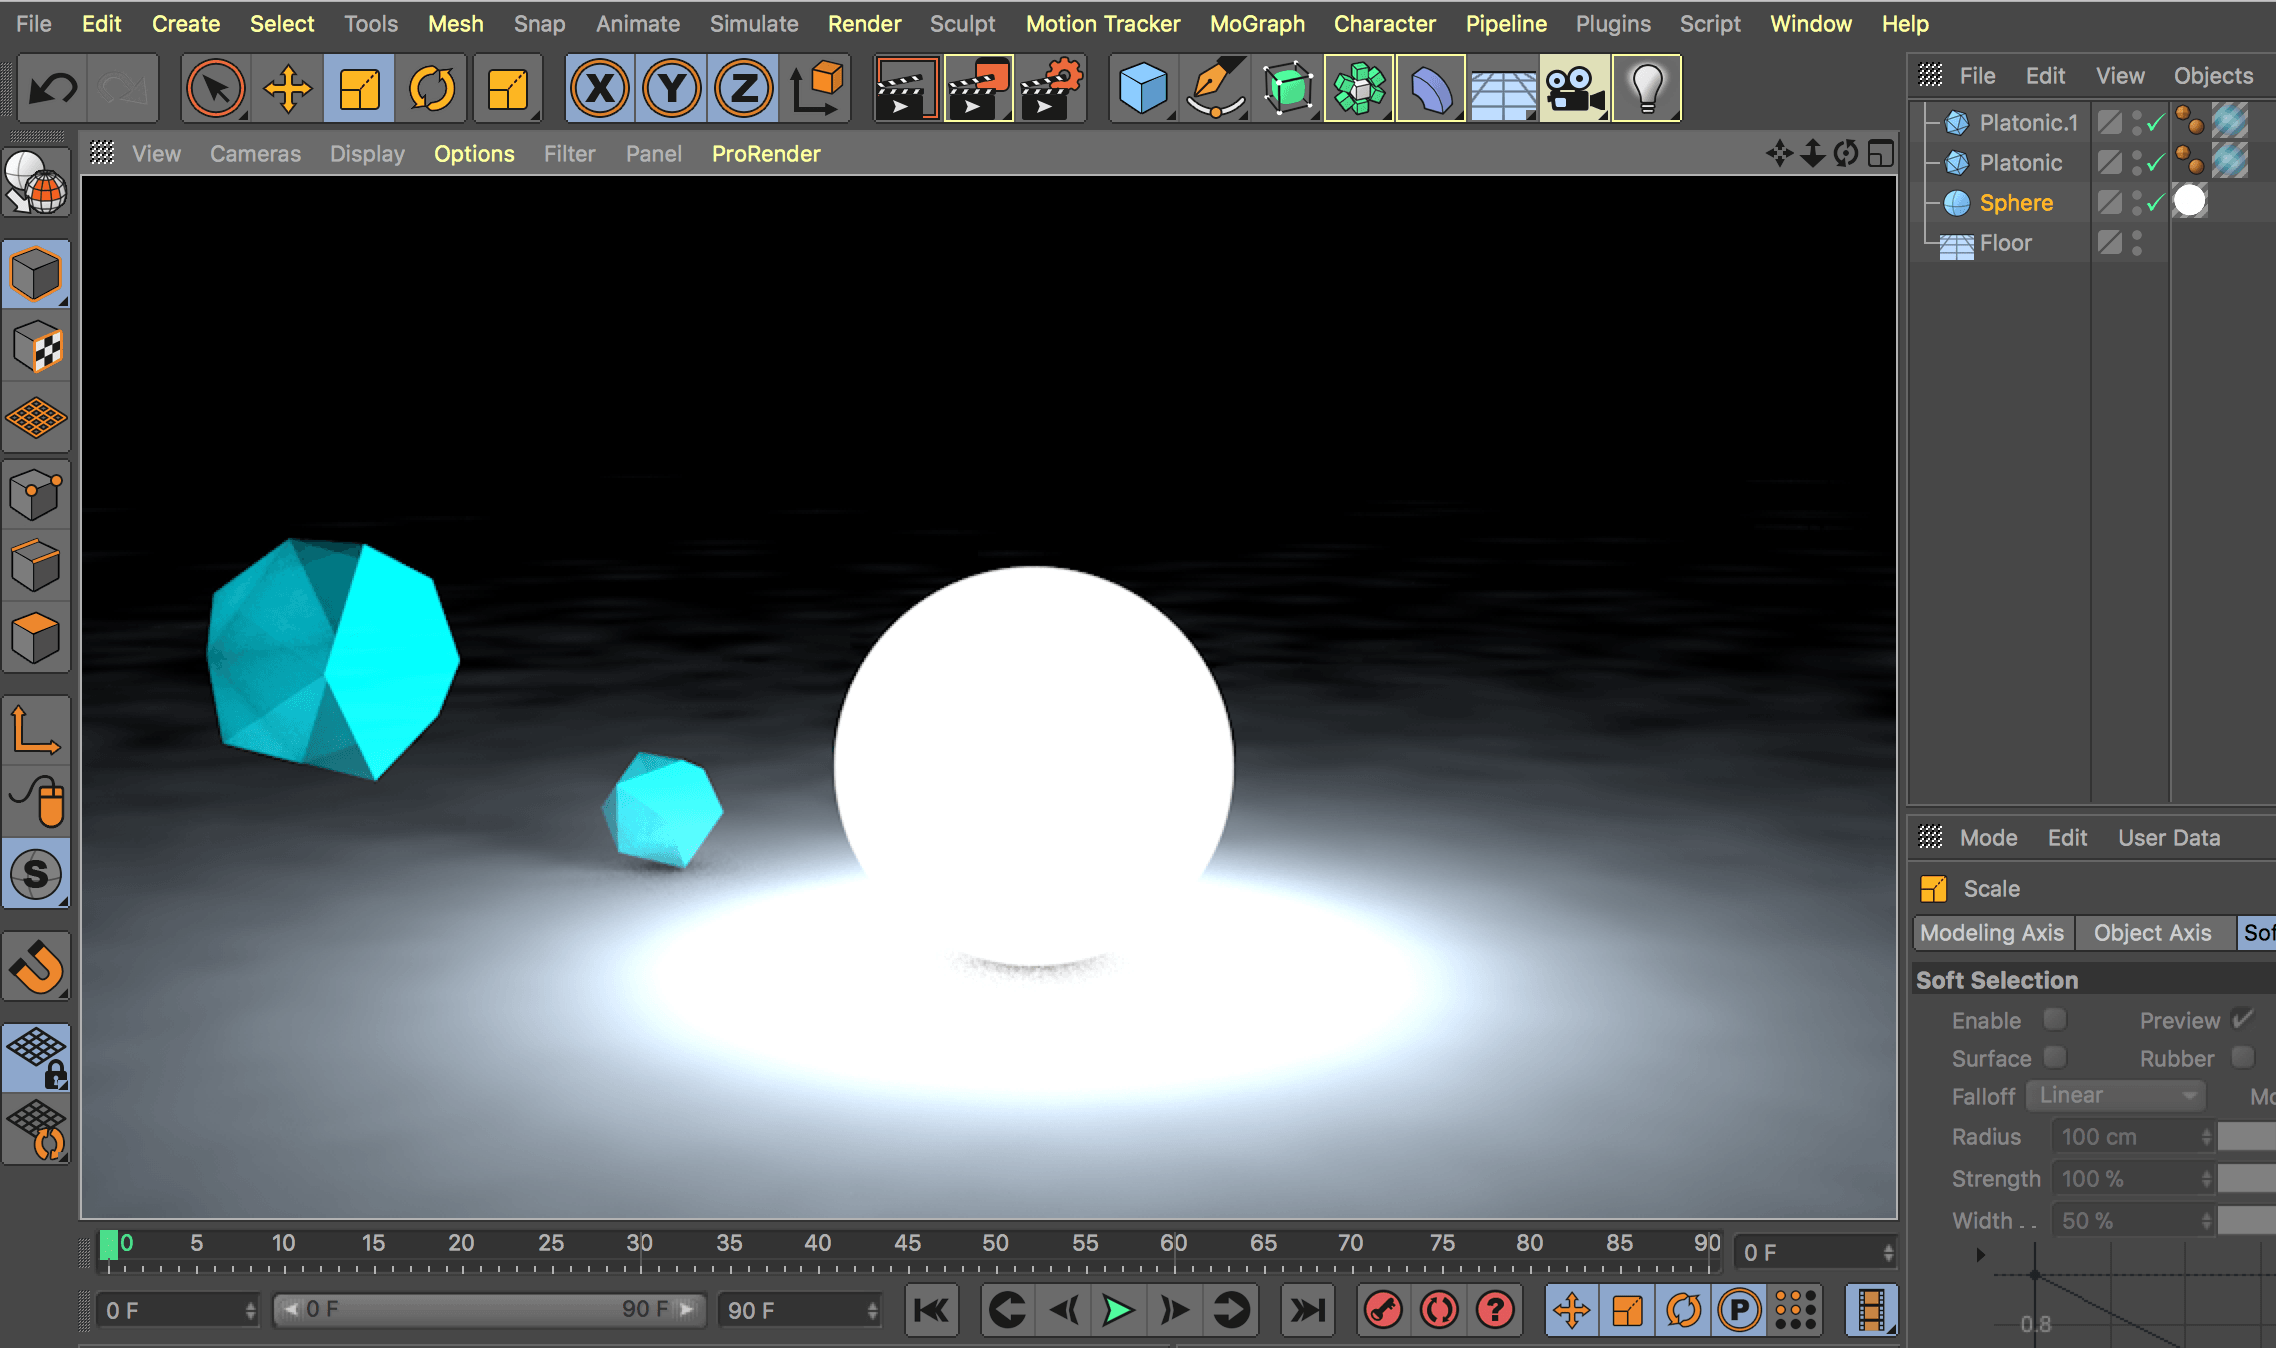
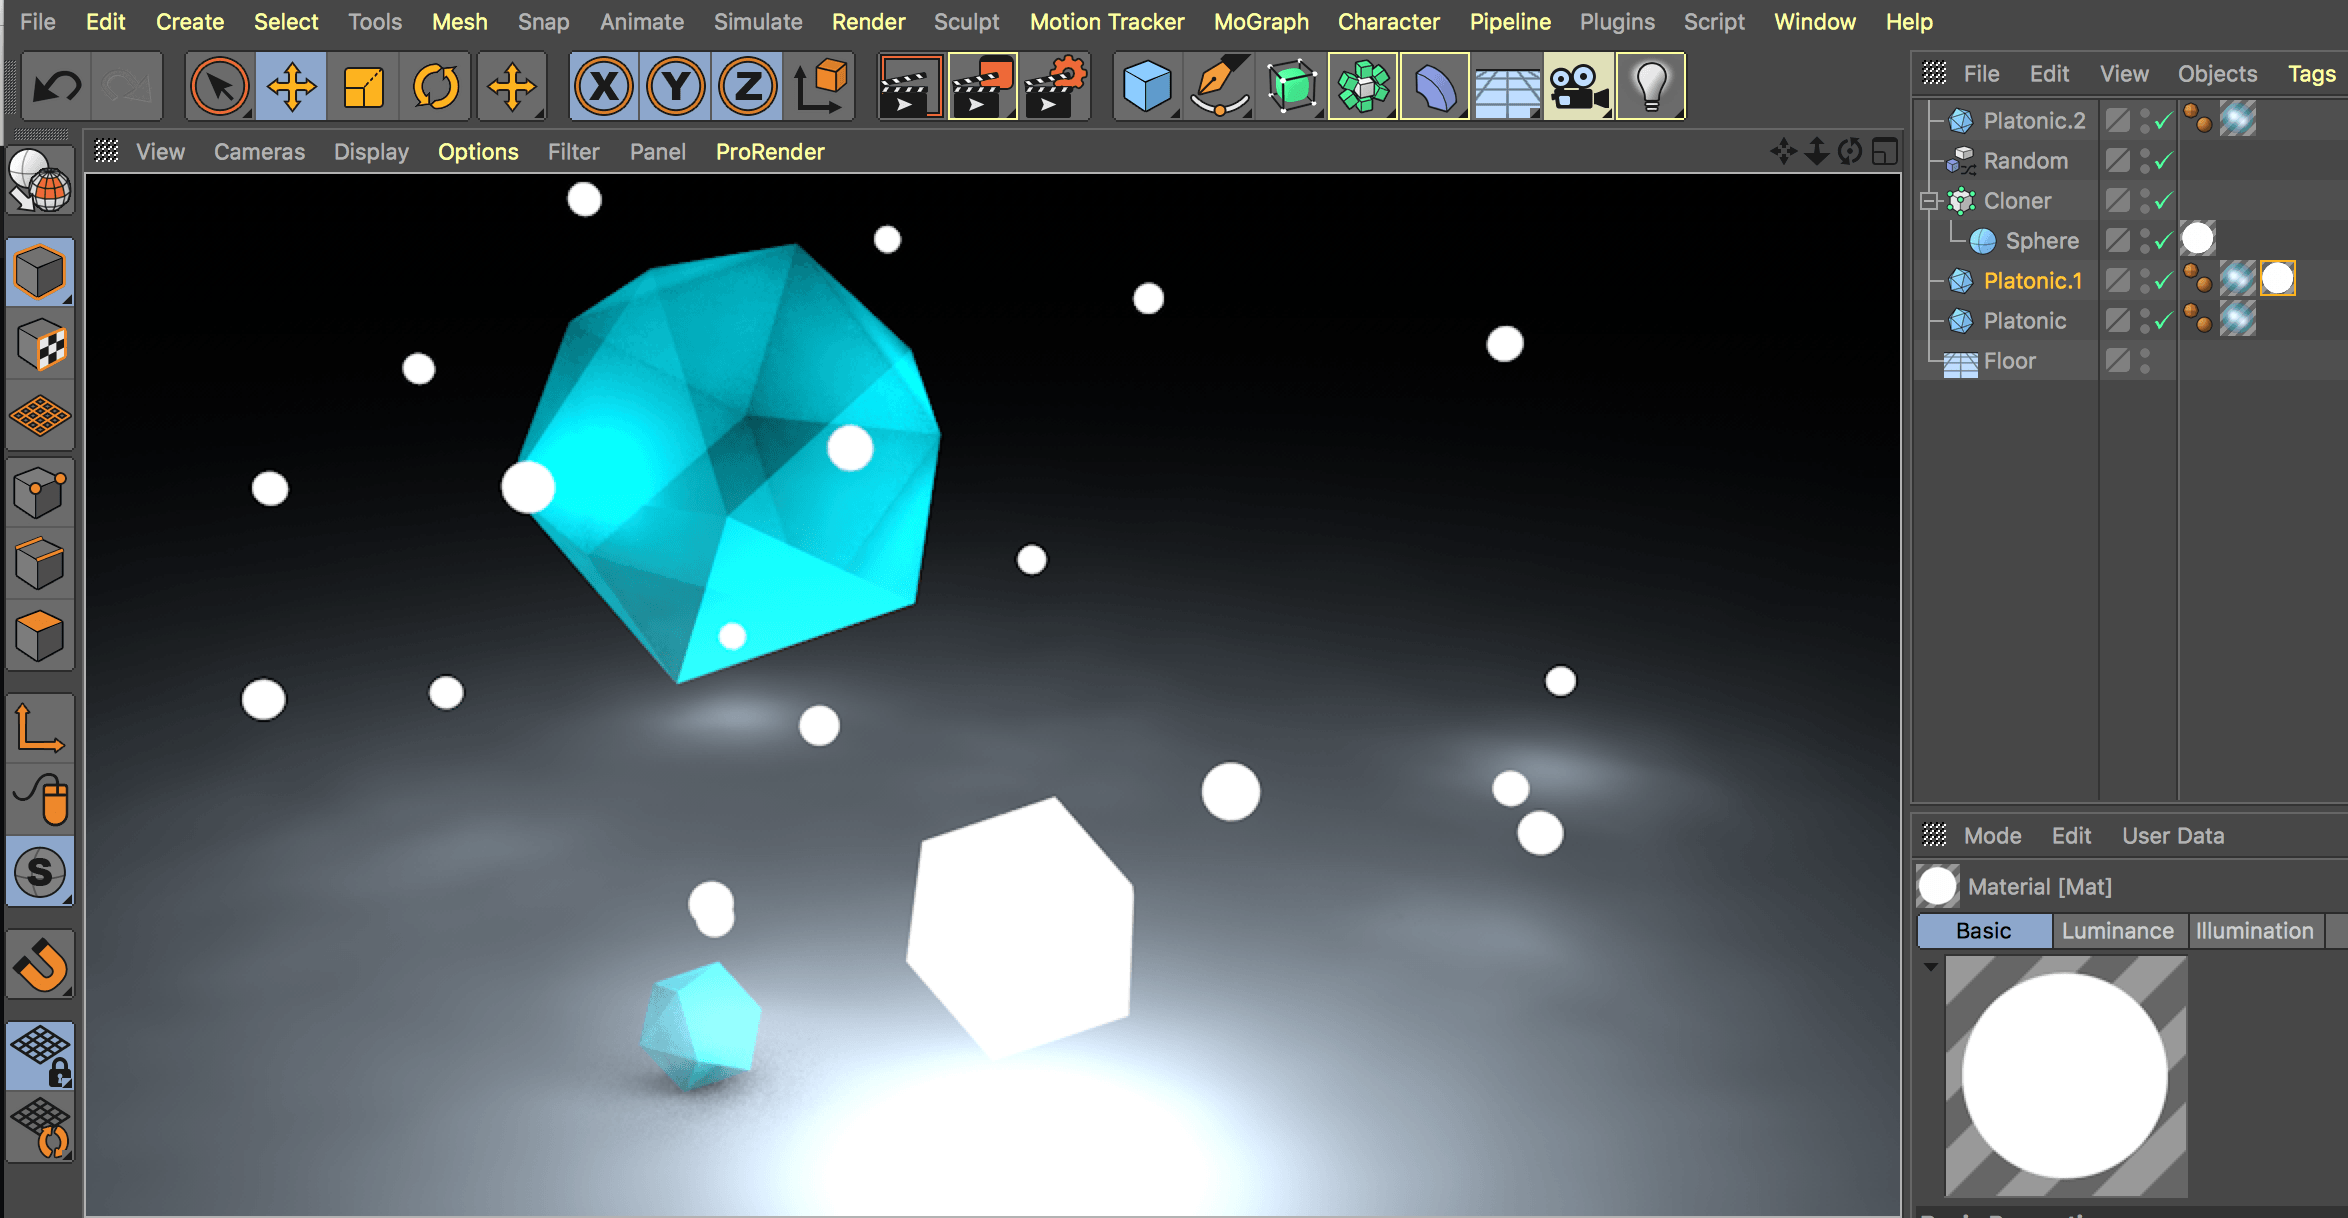
I then took time to make my own experiments in Cinema 4D with transparent objects and many small luminance spheres mixed with cloner and random effectors.

Zrzut ekranu 2017-11-28 o 22.19.00 Zrzut ekranu 2017-11-28 o 23.18.14


I also watched a video which explained how to create an object glowing through transparency.

When we create a regular object with glow and luminance material, it won’t have the effect inside a transparent sphere. First step to making the glass ball visible was going into transparency settings and using refraction preset specific for glass and then applying an HDRI image to the texture (we can make it invisible by ticking off “seen by camera” in the Compositing Cinema 4D tag and then also untick “seen by refraction” not to see the elements of the sky). Sphere is blocking the glow as it’s a post effect, so we switch it off for the object and use it from the render settings instead.

Another useful tip was assigning ID number to object. This way, we can choose which objects are affected by the glow setting and which aren’t.

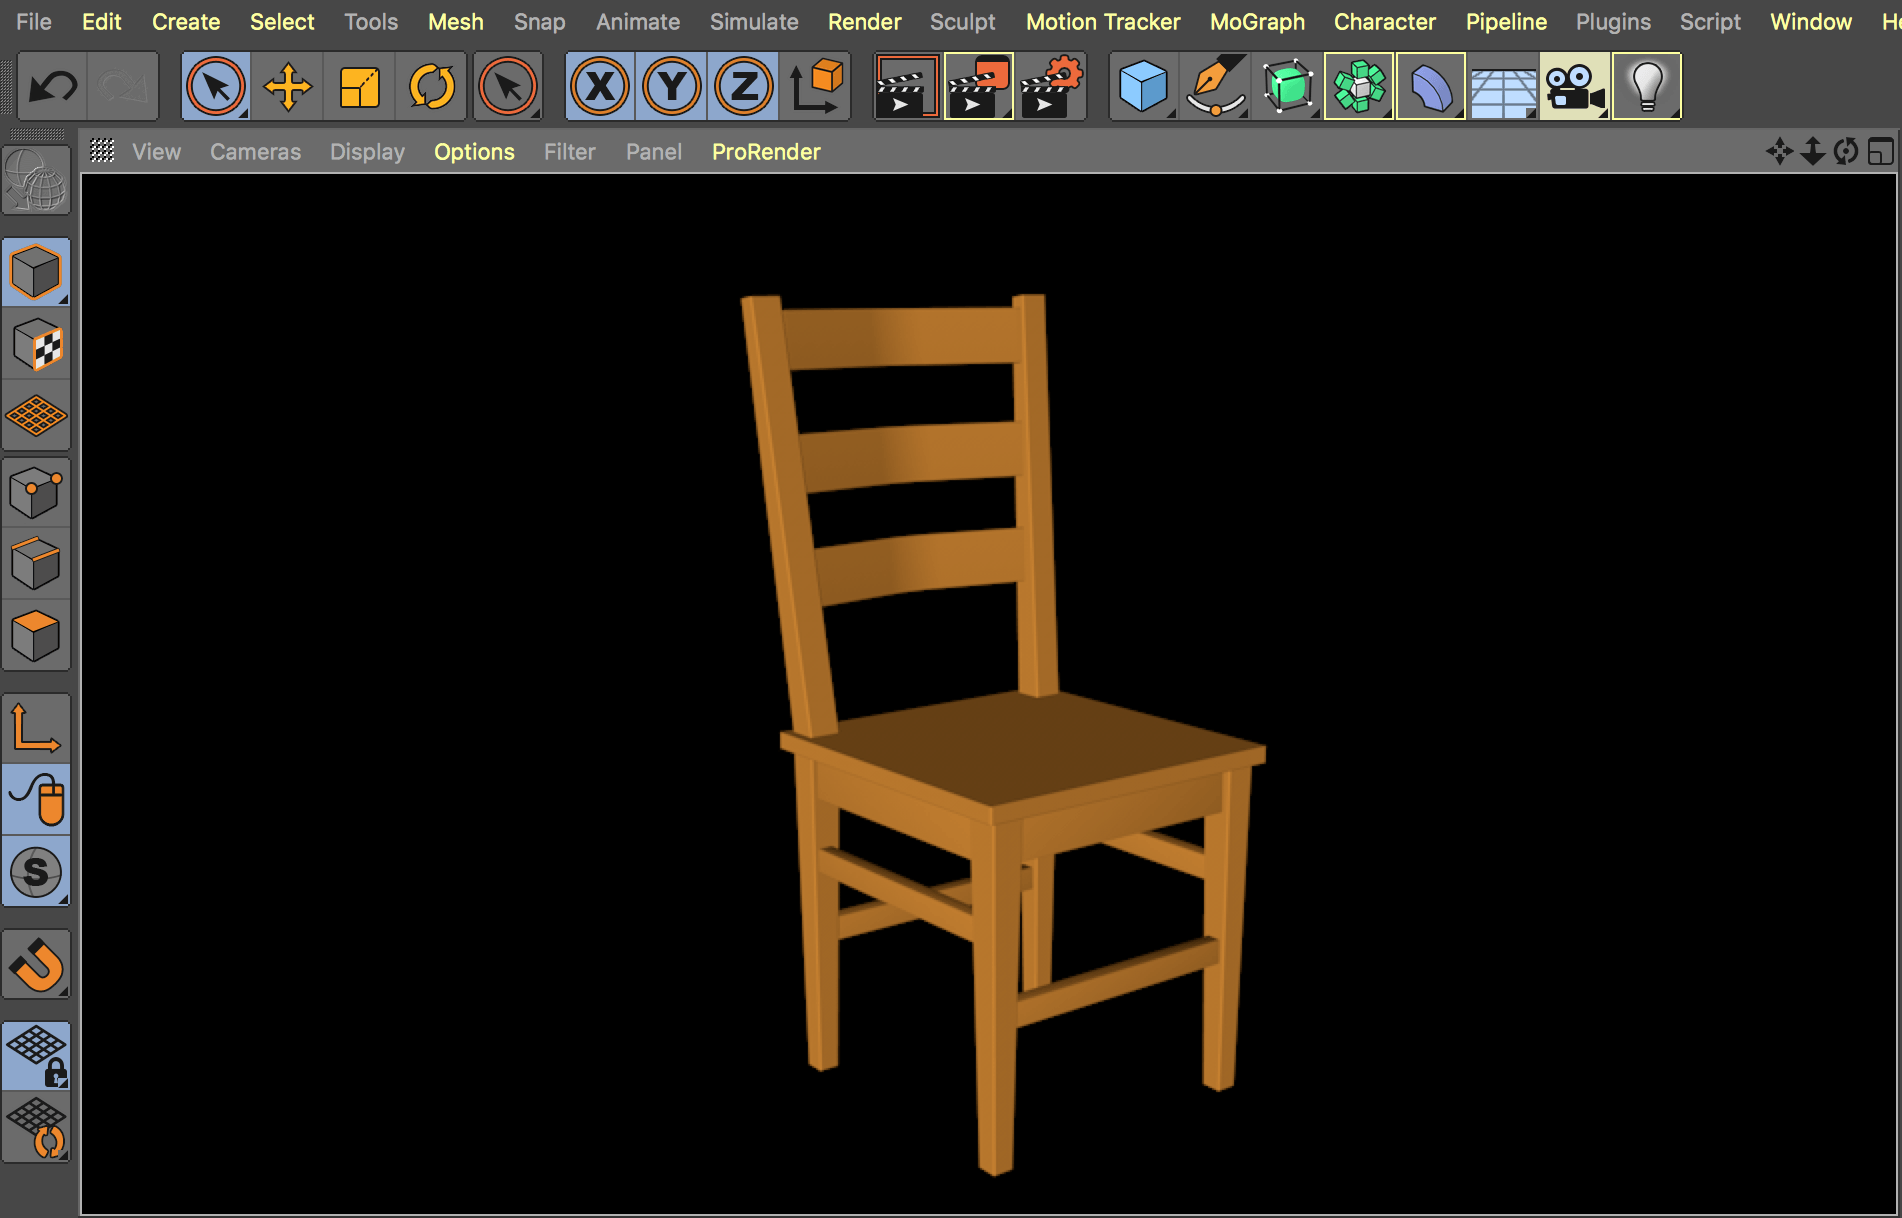
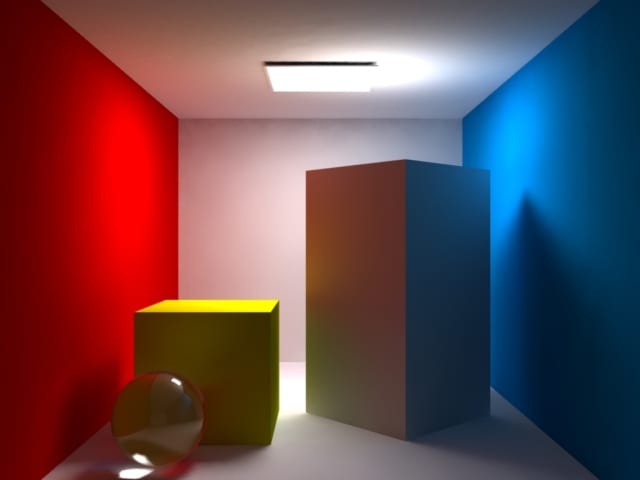
One final video that I learned from was rather emissive material unrelated, but it greatly explained how to render light realistically using native render engine in an easy way.

It saves us a lot of problems with the renderer settings and complicated processes in favour of extended render time. The two main elements we apply are:

– reflectance based materials

– luminant surfaces

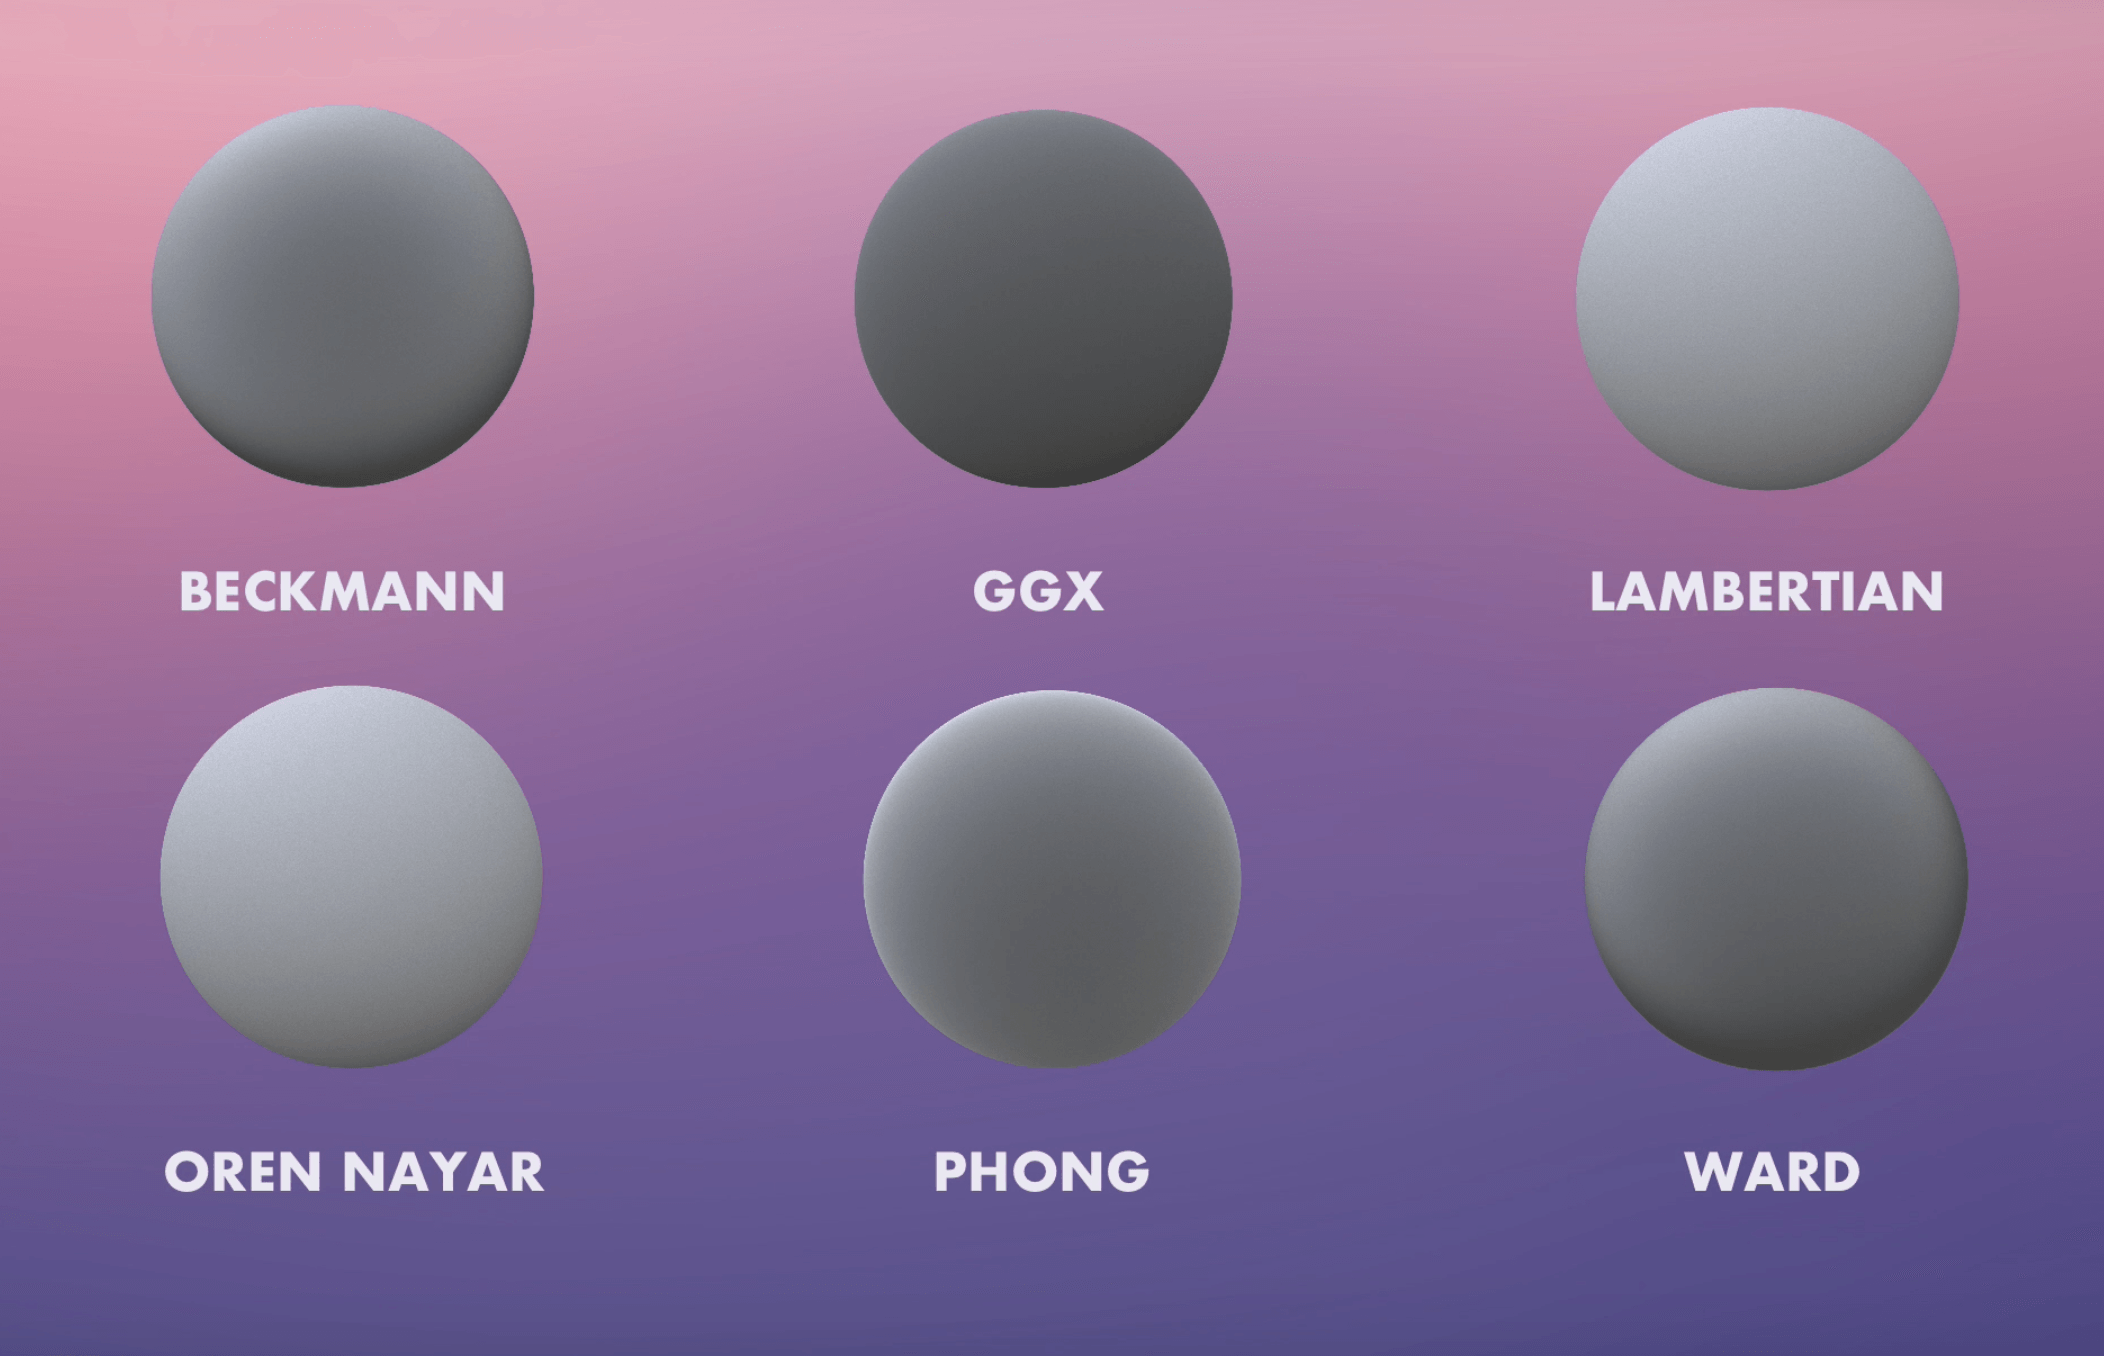
It explains the parameters of the materials applied to the mesh and to the sphere + plane (soft box) which cast the light and make the shadows softer at the same time.

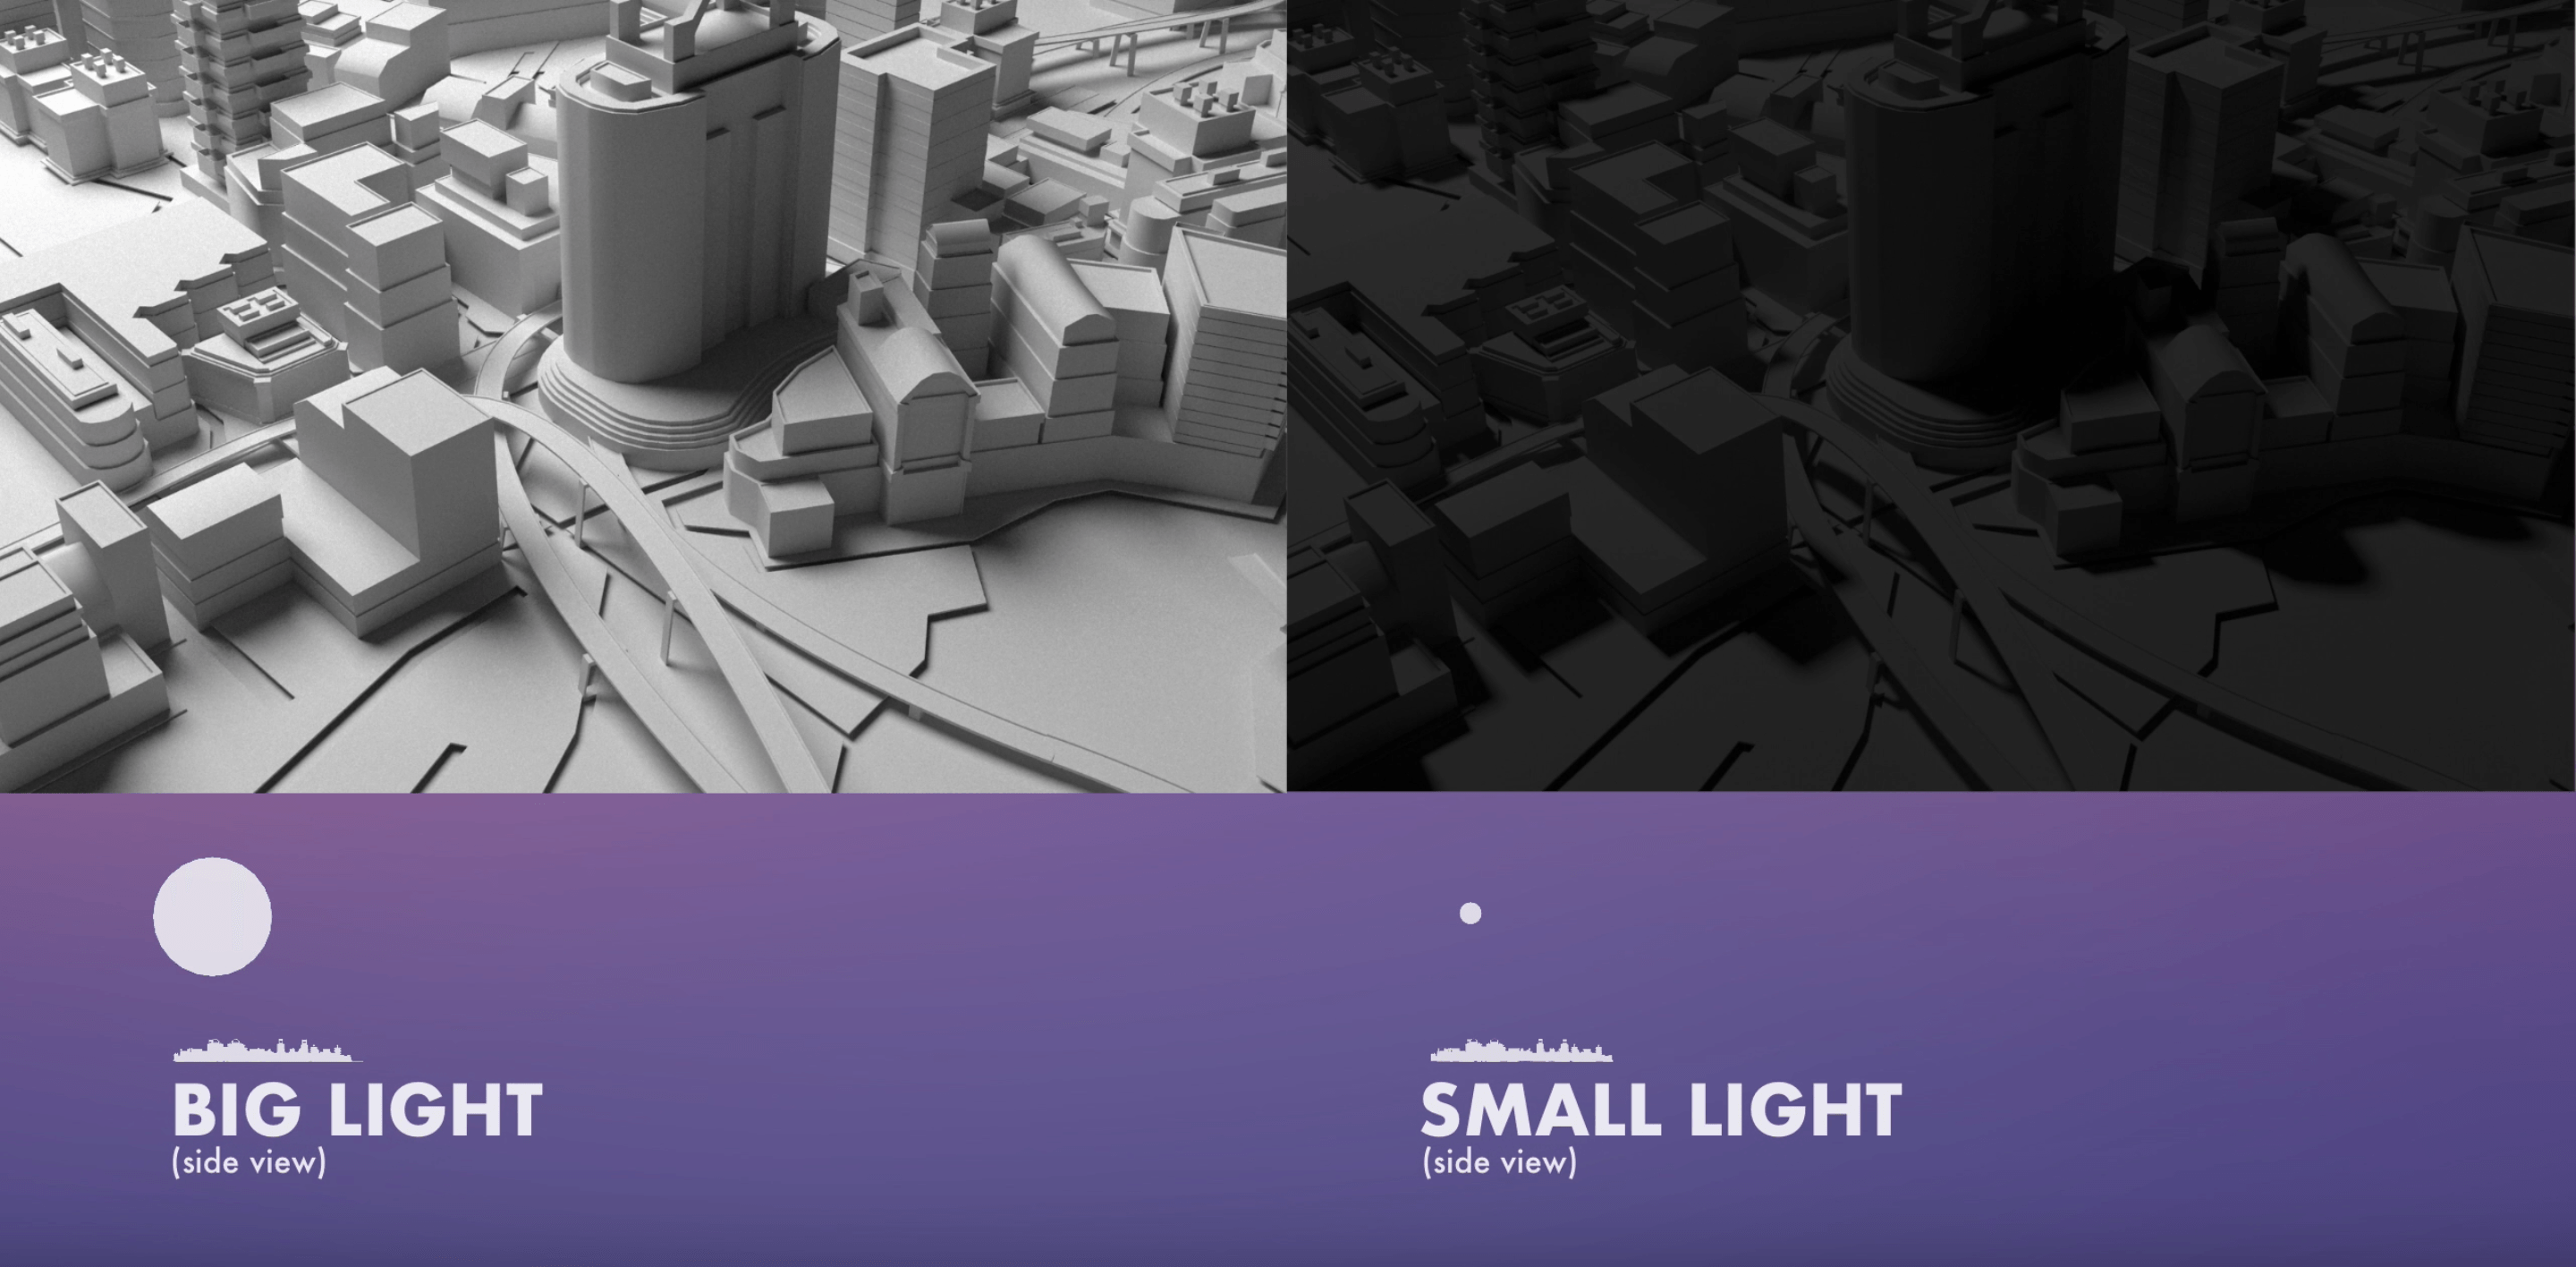
Some screen grabs from the tutorial presenting useful lighting and material comparisons:

Zrzut ekranu 2017-11-30 o 13.02.14 Zrzut ekranu 2017-11-30 o 12.38.32 Zrzut ekranu 2017-11-30 o 13.00.37

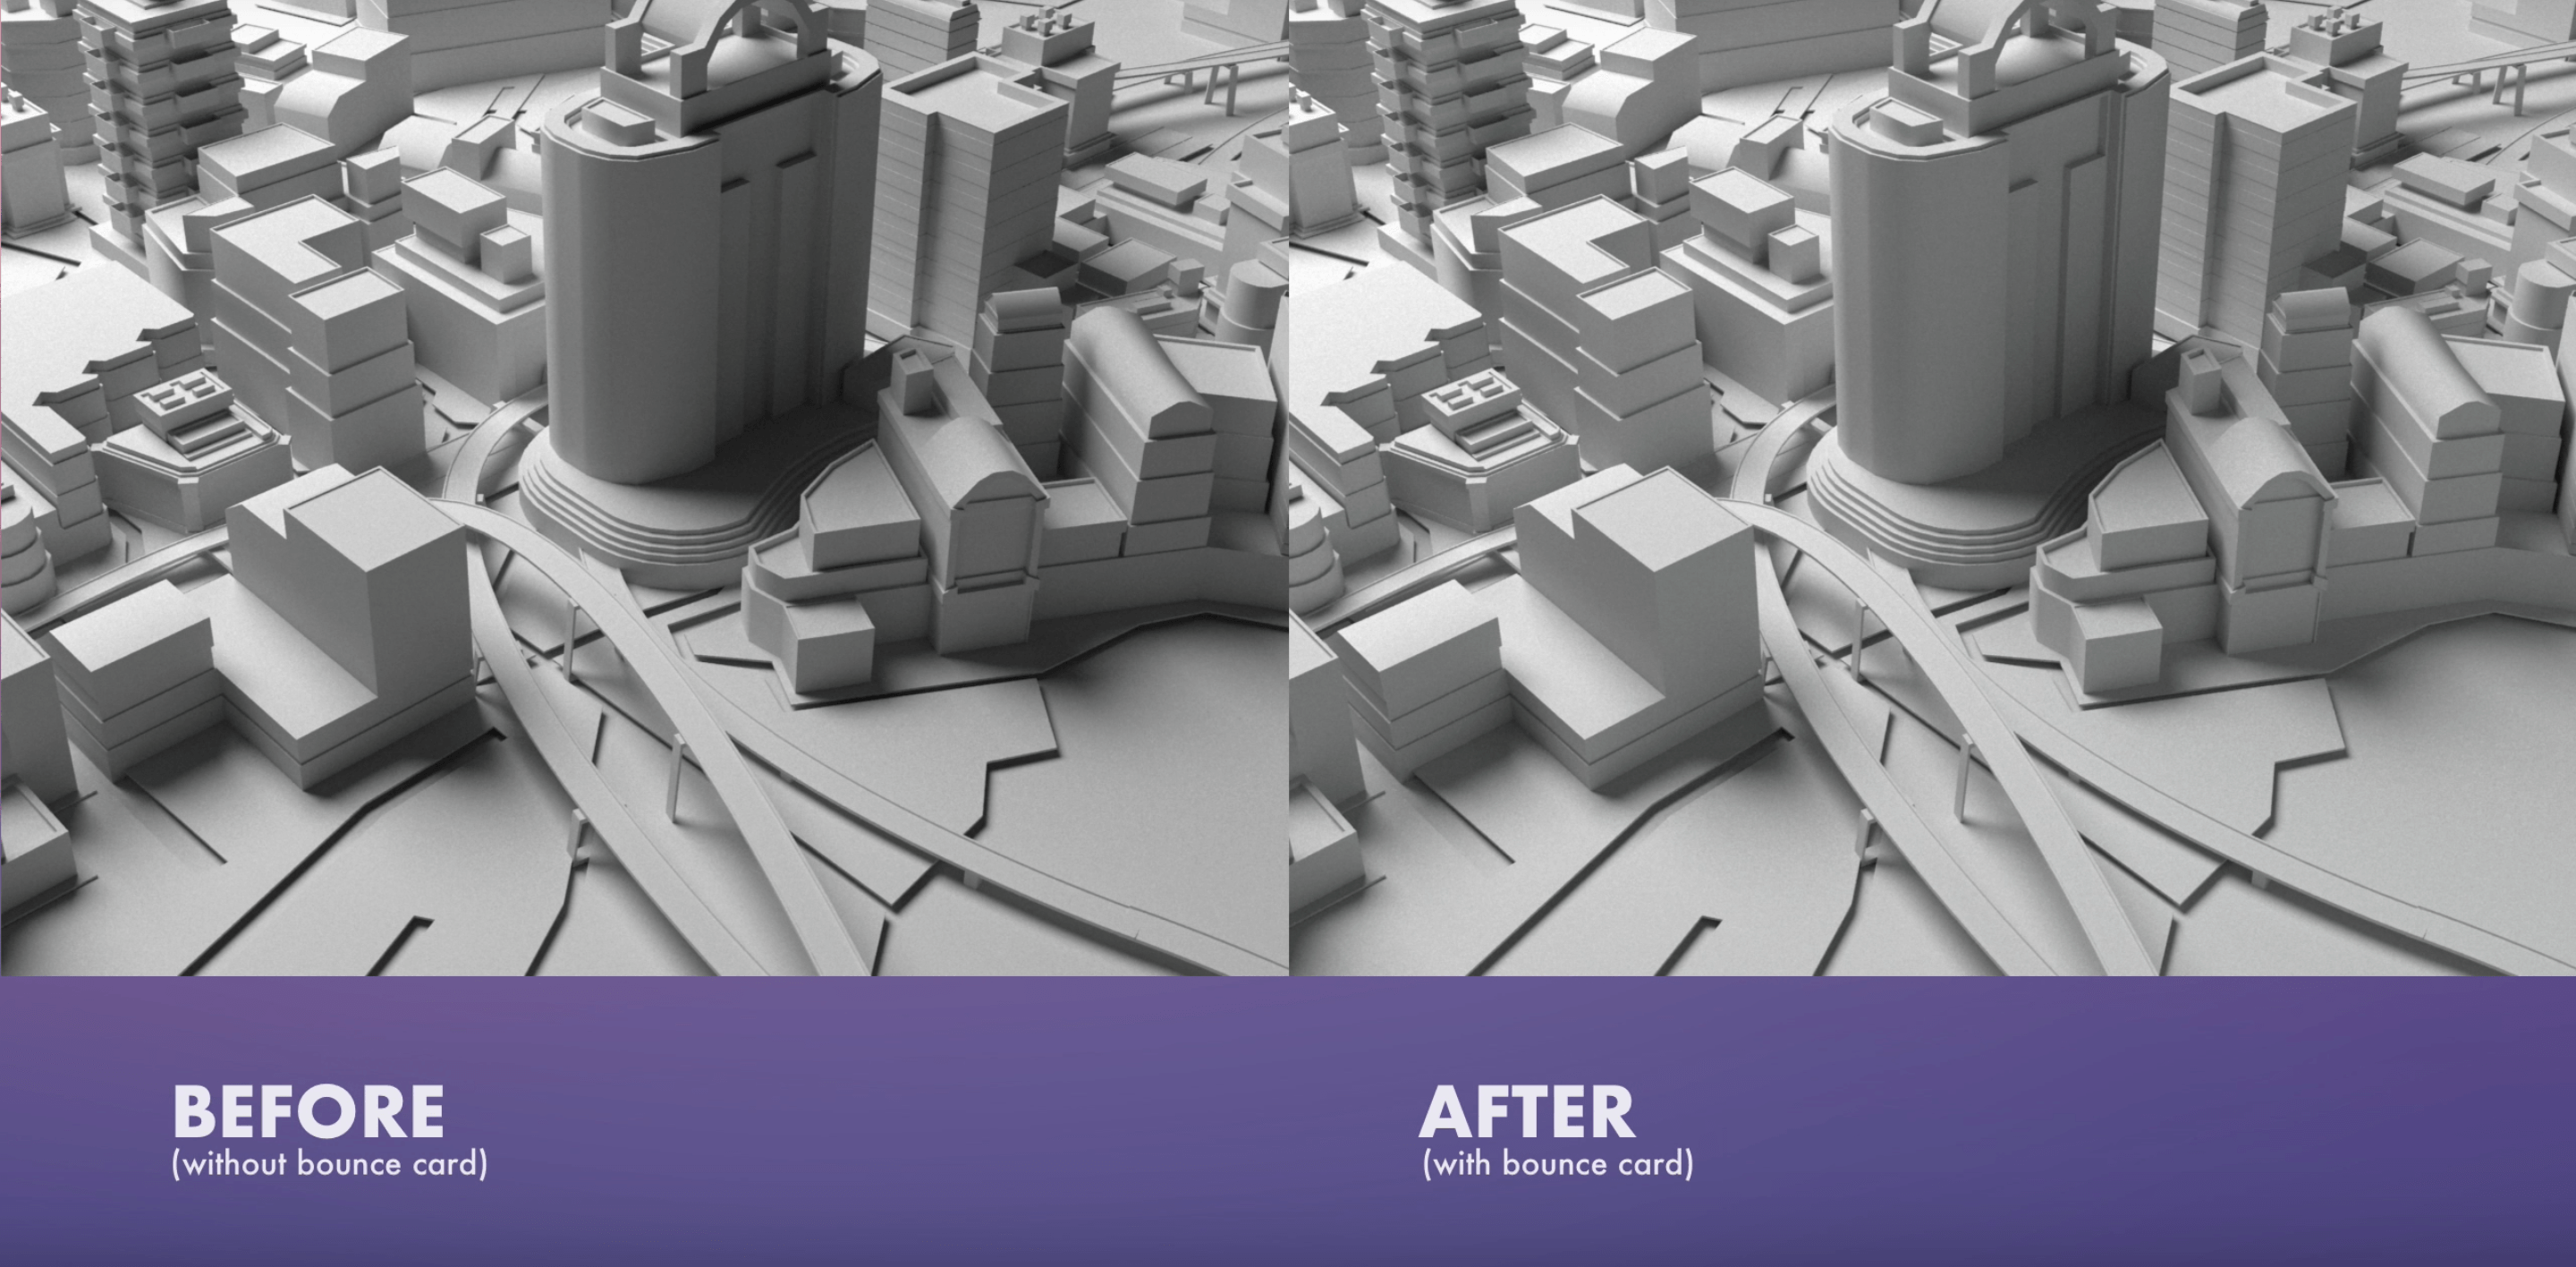
(Bounce card is the plain complementing the softbox set with the sphere + luminance material)


Zrzut ekranu 2017-11-30 o 12.45.10

Substance Painter

One last outstanding task was a write-up on my experience with Substance Painter. I wanted to use it in order to create realistic textures and materials for my objects. First of all, I watched a brief video on how to import an object from Cinema 4D and open it in SP based on colour profile.

For some reason I had problems that I couldn’t fix. When I opened my model in the .obj format, the low poly style seemed not to work, as the mesh was smoothened. I then tried another format that I found out about – .fbx. In this case it seemed to be closer to the result I need, but the issue was an odd displacement of the hair, moved to the right from the head.

I know that Substance Painter is a powerful tool and it’s worth using, but I then learned more about the Physical Renderer in Cinema 4D and found out that it’s possibly enough for me to work with for now. Rather than trying to fix those issues (which I’m sure aren’t hard to work out), I preferred to move back onto modeling itself and rendering inside C4D.

I will definitely come back to Substance Painter and try to get some experience after Christmas, when my skills within Cinema 4D are more refined.

Zrzut ekranu 2017-11-24 o 13.53.57

Zrzut ekranu 2017-11-24 o 13.55.44

Zrzut ekranu 2017-11-24 o 13.57.46

Zrzut ekranu 2017-11-24 o 13.58.51


General sketch + objects in the scenes

I had an outstanding task of sketching out how the scenes will look like and listing elements of the composition for each of the artists. First of all, I made a general sketch (I know it’s awful) to visualise my idea. In general, it will be the head in the center with an emissive colour applied (one strong accent of the composition) and transparent, toneless objects around it, reflecting the glow. What inspired this concept was an image made by Mateusz Lengling. I loved how the grainy, grey background and general colour theme contrasts with the neon green object.

strongaccent


Each of the artists will have two small, repetitive elements floating around in different perspectives and main objects representing their musical legacy, oriented frontally towards the viewer.

travissketch

As it’s still the learning process and I will have time to decide on the final objects (some of the artists will release new albums by then as well), it’s good to keep the options open. Although I’ve listed my potential ideas:

Travis Scott:

– Houston street sign

– butterflies

– eagle

– owl

– pills

– cactus

– flame

– opened window (Antidote song)

– elements from his new Astroworld album which is yet to be released (it’s a name of a theme park in Houston which was closed)

Tyler the Creator:

– sunflower

– bee

– donut

– “OF” symbol

– American pancake

– cat head

Kendrick Lamar:

– Compton street sign

– DNA structure

– kung-fu element

– crown

– pen

A$AP Rocky:

– grills (teeth)

– diamonds

– purple smoke

– dollar notes

– A$AP Mob symbol

– music tape on a pillow (Cozy Tapes)

– Harlem (NYC) street sign

As I mentioned, these elements could be a subject to change, but for now that’s what I can see in my concept.

Further practice – Cinema 4D

This week, apart from the research included in the previous post, I have gone through another rather basic tutorial. Recently, I was a bit more focused on the theory rather than practice, so I felt, that I should create something simple, just to stay consistent in terms of the skills. I followed a video about the creation process of a wooden chair.

It seems rather easy comparing to some other things I’ve been making, but I noticed that it’s important to keep using the most basic skills. I’m trying to learn something new whenever I use Cinema 4D, but then I realize that I often forget the most essential tools.

Although, there were still a few things that I didn’t know before:

– K+L – knife loop cut, which helps to divide objects into more lines, in order to make a bit more complex extrusions and modifications (in this case it was for the legs of the chair)

– loop selection – as the name suggests, helps to select the whole loop around the object.

– I sometimes struggled to find Object Settings. That was because I made objects editable, which in consequence removes that tab.

– soft selection – I selected the back of the chair and added some more segments to it, then pushing it slightly outside. This type of selection provided a smooth connection between the segments, creating a more natural curve.

Zrzut ekranu 2017-11-22 o 22.08.34 Zrzut ekranu 2017-11-22 o 22.25.44

I did not completely finish it, as I’m trying to only take out bits that could be the most useful skills for me now.

I’ve also gone through another tutorial partially.

The second one helped me to find out about the pen tool and object outlines + Lathe tool. Outline made in a flat perspective can be rounded up to be a physical object. Another way to fill the outline and create an object is “Extrude” effector. Also, holding shift breaks the handle, which is working pretty much the same as the Adobe Illustrator tool.

Iron Tool shrinks down and rounds the edges of the path.

This tutorial is way more complex, it introduced viewers to the glass material, lighting (using the HDRI rig I mentioned in the previous post), liquid and a lot more, but I only wanted to get a better understanding of the pen tool.

Various render engines and scene lighting

Initially, I didn’t plan to create this post, as it’s just a number of small bits of information that I needed to assemble for a better understanding of how to achieve a more realistic look of the scene in Cinema 4D, but in the end, I’ve decided that it’s too much not to be mentioned.

First of all, what confused me a lot was the fact that in many tutorials, there was 3rd party content and render engines used. In particular, I found names like Octane, Arnold, Cycles, Redshift mentioned frequently. I was wondering what are the differences and why are they being mentioned so often. Does it mean that the built-in renderer is not good enough?

renderes

What was even worse, most of this content are very expensive plugins. It seemed almost like there’s additional features in any more complex tutorial. I decided to go through some theoretical aspects of Cinema 4D and found this article comparing those engines. In essence, all of them offer features best for different purposes. Physical is the renderer included in Cinema 4D for free:

“I suggest you stick with Physical if you are tied down by hardware/OS and haven’t a budget to upgrade to anything else. It’s also entirely satisfactory if you don’t find yourself rendering any complex photo-realistic animations on a regular basis. It’s quite adequate on stills and can even handle distributed rendering with Team Render to Picture Viewer.”

While Octane is way faster and provides easier photorealism, it’s also too expensive for me to afford at the moment. With what I’ve found out, it seems that the original C4D engine will be good enough for my project. Also, some of the tutorials are made by companies which created those plugins, so they try to implement them and encourage to buy their content.

Another feature that is often mentioned as an additional plugin, is a HDRI rig plugin providing a studio-like photorealistic lighting. It allows the user to quickly use presets and photos to set up a professional looking light surroundings.

HDRI (High Dynamic Range Imaging) is a technology that expands the dynamic range of an image and shows details in both shadows and highlights.

Dynamic Range is a range of brightness values that can be recorded on media (film, photographic plate, photographic paper) or on the matrix of a digital camera. (source)

I also found a few useful tutorials that I will put more focus on closer to my first rendering experiments, which help to create a similar setup by ourselves, without a need to pay extra + a free alternative for a ready made preset (4th video):